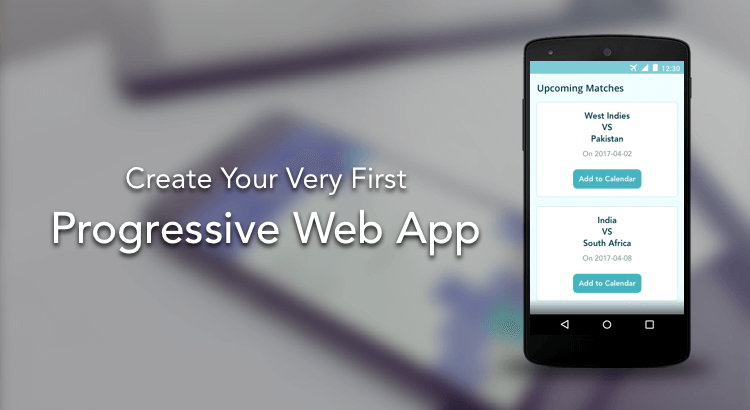
Why do businesses prefer to have native apps even though they have fully responsive websites? Native apps load faster, give full-screen experience, have offline capabilities, support push notifications, and significantly add to user convenience. What if your mobile website had all of these benefits? That’s what a Progressive Web App is all about—the rich experience of an app and the full functionality of a website.
Progressive Web Apps (PWA) make use of the new capabilities of browsers to provide a full screen, feature-rich experience to users regardless of space and bandwidth constraints. If you use Progressive Web Apps, your users will get new features as soon as you push your changes to production. No more painful app updates. Now, you get an idea why businesses are going gaga over Progressive Web Apps.
Steps to Create an Offline-First Progressive Web App
Let's build an offline-first Progressive Web App that can deliver the details of upcoming cricket matches. Push notifications are not covered in this blog post for the sake of brevity.
1. Create index.html File
<!DOCTYPE html>
<html lang="en">
<head>
  <meta charset="utf-8" />
  <meta http-equiv="x-ua-compatible" content="ie=edge" />
  <meta name="viewport" content="width=device-width, initial-scale=1, minimum-scale=1, maximum-scale=1" />
  <link rel="manifest" href="/manifest.json">
  <script type="text/javascript">
    if (navigator.serviceWorker) {
      navigator.serviceWorker.register('/serviceWorker.js')
    }
  </script>
  <title>Cricket Feed</title>
</head>
<body>
My First Progressive Web App
</body>
</html>
You might have noticed two things in the above code: ‘manifest.json’ and ‘serviceWorker.js’. The manifest.json file provides the metadata of your application to the browser. Service workers are web workers that can live outside DOM and make requests on behalf of your app. Service workers need to be served through HTTPS protocol for security reasons. Localhost is also supported for the sake of development.
2. Create manifest.json File
In the manifest file, you can define the app’s name, theme color, icon, orientation, and so on. I have added a few in this example. You can find the complete list of manifest variables here.
{
  "name": "CricFeed",
  "short_name": "CricFeed",
  "start_url": ".",
  "display": "standalone",
  "background_color": "#fff",
  "description": "Cricket Feed PWA",
  "icons": [
    {
      "src": "images/ball_48.png",
      "sizes": "48x48",
      "type": "image/png"
    },
    {
      "src": "images/ball_96.png",
      "sizes": "96x96",
      "type": "image/png"
    },
    {
      "src": "images/ball_192.png",
      "sizes": "192x192",
      "type": "image/png"
    }
  ]
}
3. Install Service Worker
Now that the manifest file is in place, we need to install the service worker.
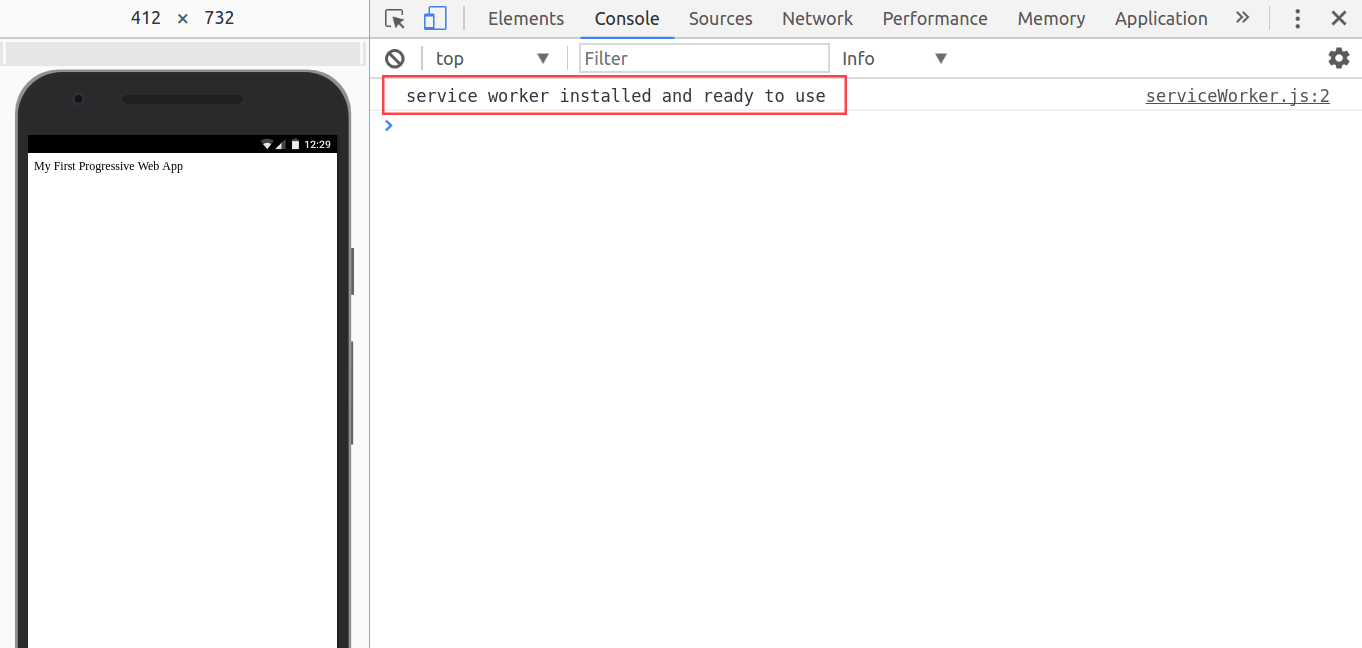
self.addEventListener('install', function (event) {
  console.log('service worker installed and ready to use');
});
The above code makes the Progressive Web App installable. Let’s check our website on a browser. Fire up a server. I’ve used Python SimpleHTTPServer. You can use any server of your choice. Use the command below to start a server at http://localhost:8000.
python -m SimpleHTTPServer
You can see the “service worker installed” message on the console.
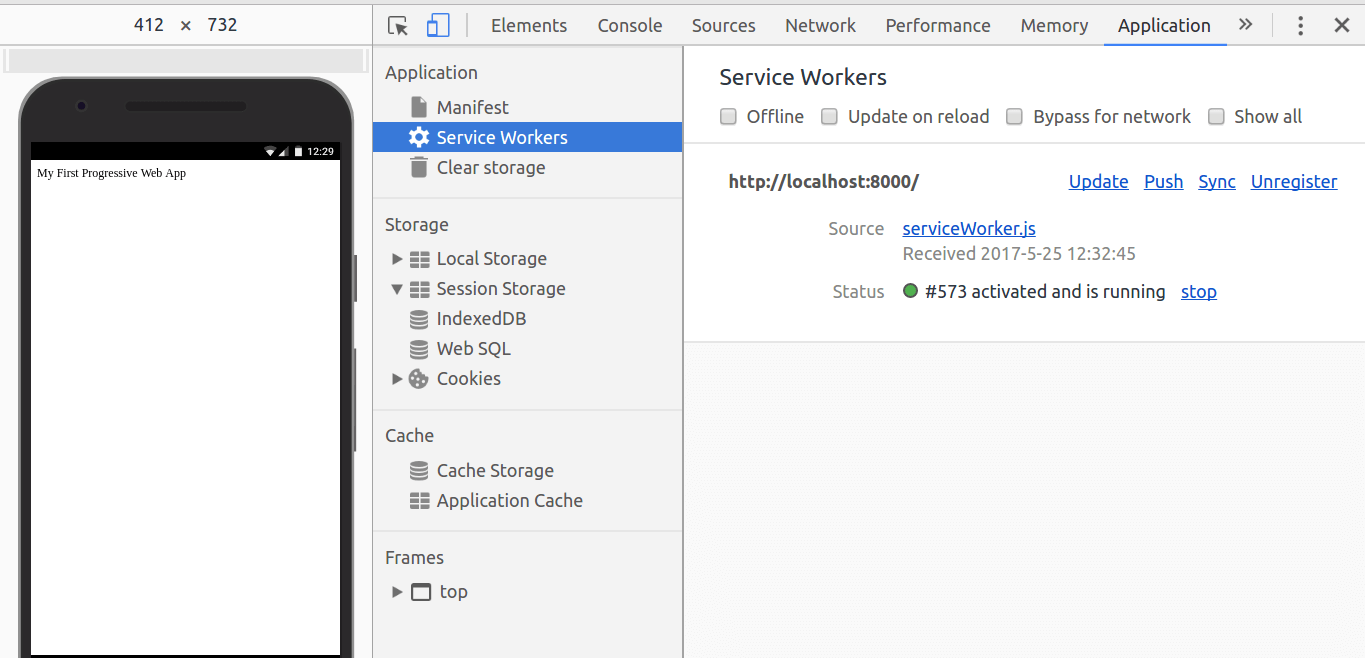
 Let’s inspect it in Chrome DevTools. Open Application tab in Chrome DevTools. The service worker is activated and running. To check the Manifest file, click Manifest. There is an Add to homescreen link on the right side of the screen. You can use it to test whether the app is installable or not.

You can inspect the service worker on the
Service Workers tab.
4. Bring Data to the App
Create a new file,
app.js, with the following lines of code. Link it with your index.html file.
`use strict`
const API_KEY = "zqSwzbdKdAfnR491Nvo80MQZgZW2";
const API_BASE_URL = "https://cricapi.com/api/";
const API_END_POINTS = {
  COMING_MATCHES: 'matches',
  OLD_MATCHES: 'cricket',
  SCORE: 'cricketScore',
  CALENDAR: 'matchCalendar'
}
fetch(`${API_BASE_URL}${API_END_POINTS.COMING_MATCHES}?apikey=${API_KEY}`).then(response => {
  if (response.status === 200) {
    response.json().then(function (matches) {
      let matches_div = '';
      for (let index in matches.matches) {
        matches_div += `<div class=" demo-card">
              <div>
                <h2>
                  ${matches.matches[index]['team-1']} <br>
                  vs <br>
                  ${matches.matches[index]['team-2']}
                </h2>
              </div>
              <div class="mdl-card__subtitle-text">
                On ${matches.matches[index].date.substring(0, 10)}
              </div>
              <div class="actions">
                <a>
                  Add to Calendar
                </a>
              </div>
            </div>
          </div>`;
      }
      document.getElementById('upcoming_matches').innerHTML = matches_div;
    });
  }
})
You can find the complete code
here. Fetch API provides a way to make network requests similar to XMLHttpRequest. Unlike XMLHttpRequest, Fetch API returns a
promise.

Now you have an installable app that can live outside the browser. However, your app does not have offline support yet. The service worker comes in handy in this situation. The service worker can act as a proxy between your application and the network and return cached responses when offline. The only thing the service worker can’t do is update DOM. But it has access to Cache API, IndexedDB, and so on. We can make use of Cache to access our static assets.
5. Cache Static Assets
Remember that we have already added a listener for the install event above. Update the listener to cache the static content.
self.addEventListener('install', function (event) {
  var cacheName = 'cricApp-v-0';

  var apiRequest = new Request('https://cricapi.com/api/matches?apikey=zqSwzbdKdAfnR491Nvo80MQZgZW2');
  var fontRequest = new Request('https://fonts.googleapis.com/css?family=Roboto');

  var filesToCache = [
    '',
    '/',
    apiRequest,
    fontRequest
  ];

  event.waitUntil(
    caches.open(cacheName).then(function (cache) {
      return cache.addAll(filesToCache);
    })
  );
});
Let’s walk through the above code. We defined our cache name and provided URL for every static asset. We also provided third-party URLs so that we have everything cached and ready when the app goes offline. Then we opened the cache and added every single file to cache. waitUntil() will make sure this happens only after service worker installation is complete.
6. Serve Cached Response
Though we have cached the site, we haven’t told the service worker to serve the cached response. Let’s register another listener for every fetch event.
self.addEventListener('fetch', function (event) {
  event.respondWith(
    caches.match(event.request).then(function (response) {
      return response || fetch(event.request);


    })
  );
});
The above code listens for any fetch event. If a match is found in the cache, it serves the cached response; otherwise, it fires external requests. Refresh the browser and check whether the service worker is working.
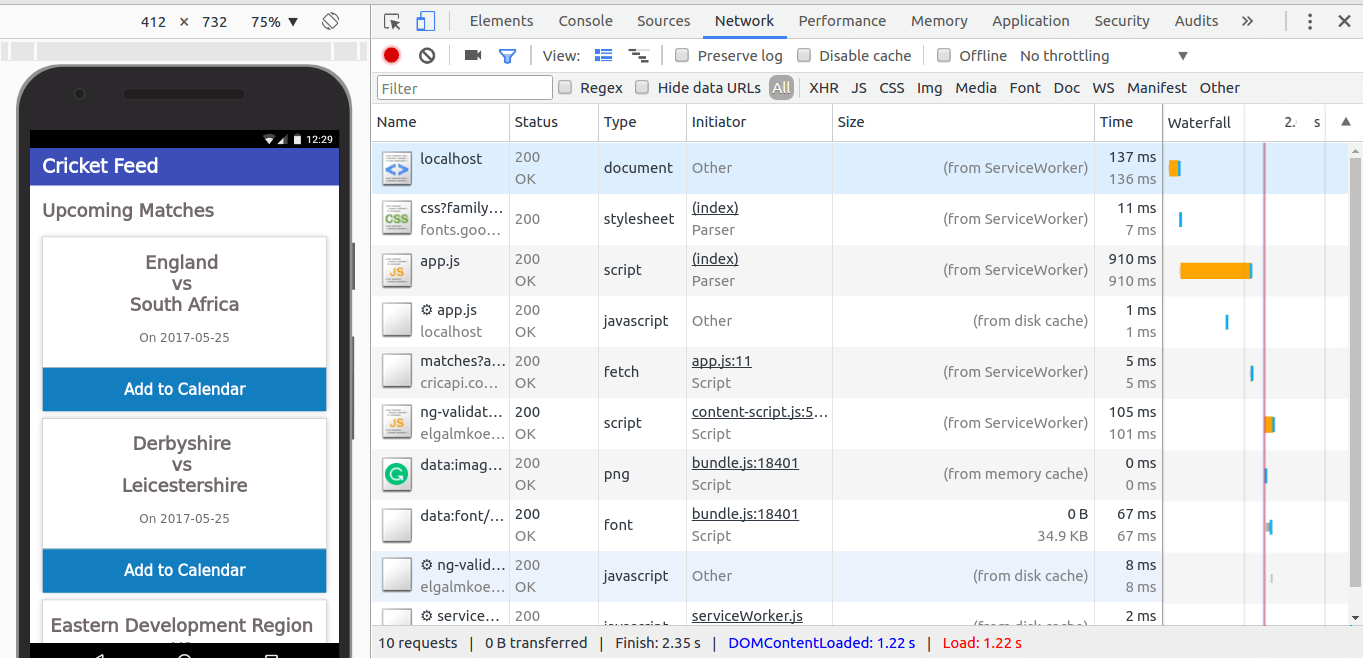
The
Size column on the screen shows that requests are served from service worker, which means our service worker is working fine. Our Progressive Web App with offline support is now ready. Test your app after disconnecting the network. You can also test it by using the offline mode in Chrome developer tools.
Additional Requirements
What I described here is a simple Progressive Web App. In a real-life scenario, you need a database to store multiple values against a key. You can use IndexedDB for that. The service worker code I’ve provided is not suitable for production use. You need to add a cache busting mechanism to clear out the cache. You can use sw-precache and sw-toolbox in production. They are actively supported libraries in GitHub and can be easily incorporated in your build process.