

I'd call Jenkins Configuration as a Code (JCasC) plugin a lifesaver.
Let me explain.
Jenkins is a great tool for automating tasks related to software development, testing, and deployment—no doubt. But configuring Jenkins and its plugins using complex Groovy or init scripts? Not exactly a walk in the park.
With Jenkins Configuration as a Code (JCasC) plugin, you can set up Jenkins using human-readable configuration files.
Configuring Plugins with Groovy Scripts
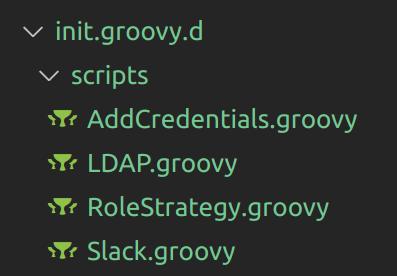
To configure third-party plugins like Git, LDAP, etc., we need to write init scripts in Groovy, which will be executed on loading Jenkins. All the configuration and generated metadata of Jenkins is maintained in the $JENKINS_HOME directory. The init scripts are stored in init.groovy.d folder and are automatically loaded after Jenkins startup. These scripts can access classes in Jenkins API and APIs available through plugins.
Let us look into some real examples for managing Jenkins configuration such as adding SSH credentials, setting up LDAP authentication, managing user roles and permissions, and configuring Slack notifications.
The Groovy scripts for setting up the above functionalities are placed under the directory as $JENKINS_HOME/init.groovy.d/. (I will share the code in a later section "Init Scripts Vs JCasC Plugin").
As you can see, each configuration is done through a separate Groovy script. This works perfectly, except that maintaining and modifying these init scripts is a hectic task.
JCasC in Action
JCasC plugin is an opinionated way to configure Jenkins using human-readable declarative configuration files. You don’t have to be a Jenkins expert to write them because the plugin translates the code into the configuration process for you. This also means faster configuration and fewer human errors.
The below image shows how the plugin interacts with the components in the Jenkins system. The bottom layer indicates the plugins that are installed in Jenkins. The middle layer represents all the Jenkins configurations, where we write a YAML file to describe properties like security configurations, credentials, nodes, views, among others. The top layer, which is also called the UI, is loaded with views and configuring of pipeline jobs.

Setting Up the Environment
First, start a Jenkins instance with the Configuration as Code plugin installed. I’m going to run Jenkins with pre-installed plugins.
The JCasC plugin searches for CASC_JENKINS_CONFIG in the system environment variable. The variable points to the YAML file in any of the following ways:
The path of the YAML file from the local folder. For example: /var/jenkins_home/configs/jenkins.yaml.
The link to the YAML file served from the web. For example: https://abc.org/jenkins.yaml.
If the JCasC plugin does not find the CASC_JENKINS_CONFIG environment variable, it will by default look for a config file in $JENKINS_HOME/jenkins.yaml.
Steps to Set Up the Environment
The JCasC plugin can be directly installed from the Web UI, but here we are going to do it with the help of plugins.txt file.
1. Add configuration-as-code to plugins.txt
First, install the JCasC plugin through the plugins.txt file along with the other plugins.
configuration-as-code:1.54
job-dsl:1.76
credentials:2.3.0
git:4.0.0
pipeline-utility-steps:2.8.0
2. Add the environment variable
Set the environment variable as CASC_JENKINS_CONFIG, which points to the YAML file path. This way Jenkins can know all the config settings.
$ CASC_JENKINS_CONFIG /usr/local/jenkins-casc.yaml
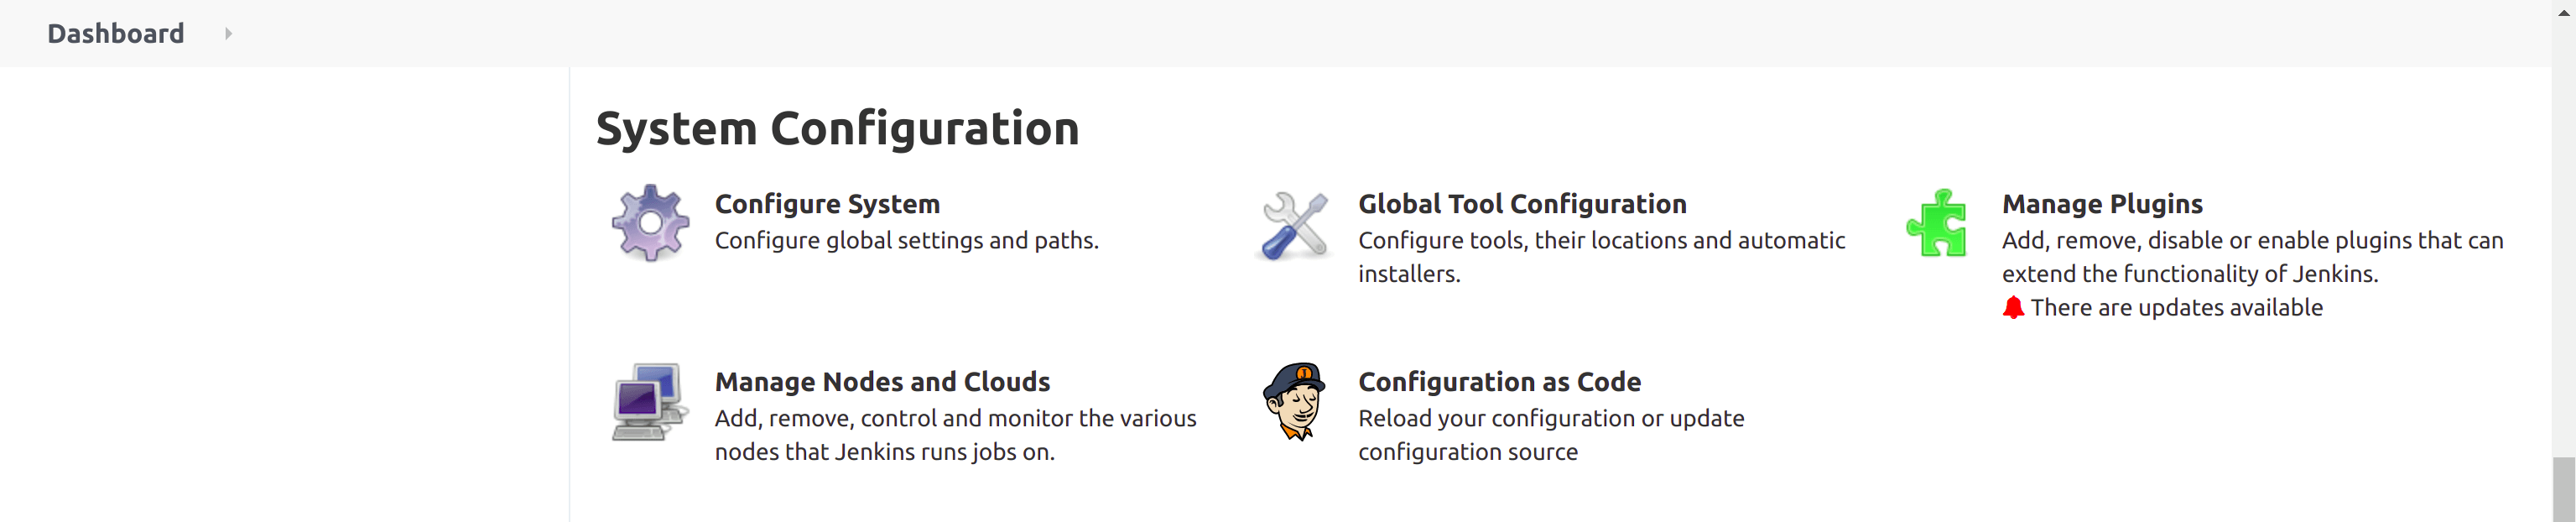
If you set up the environment correctly, you should be able to browse the Configuration as Code in the page Manage Jenkins -> Configuration as Code.
Init Scripts Vs JCasC Plugin
Most configuration changes can be easily performed using JCasC YAML. Let’s look at some of the commonly used configurations in Jenkins.
Adding SSH Credentials
The SSH key is an access credential used for securely connecting to a remote system like git repo. In the below script, we have assigned GLOBAL scope to the SSH credential.
import jenkins.model.*
import com.cloudbees.plugins.credentials.domains.Domain
import com.cloudbees.jenkins.plugins.sshcredentials.impl.BasicSSHUserPrivateKey
import com.cloudbees.plugins.credentials.CredentialsScope

def instance = Jenkins.instance

def domain = Domain.global()
def store = jenkins.model.Jenkins.instance.getExtensionList(
'com.cloudbees.plugins.credentials.SystemCredentialsProvider')[0].getStore()

def privateKey = new BasicSSHUserPrivateKey.DirectEntryPrivateKeySource(
    '''
    PRIVATE_KEY_TEXT
    '''
)

def sshKey = new BasicSSHUserPrivateKey(
    CredentialsScope.GLOBAL,
    "SECRET_TEXT",
    "PRIVATE_KEY_USERNAME",
    privateKey,
    "PRIVATE_KEY_PASSPHRASE",
    "SECRET_DESCRIPTION"
)

store.addCredentials(domain, sshKey)

instance.save()
The same functionality can be achieved using the below YAML file. The environment variables in the config file are referred using ${} notation and can be written as ${env_var_name}. For example: ${SSH_USERNAME}, ${SSH_KEY_PASSWORD}
credentials:
  system:
    domainCredentials:
      - credentials:
          - basicSSHUserPrivateKey:
              scope: GLOBAL
              id: ssh_key_with_passphrase
              username: ${SSH_USERNAME}
              passphrase: ${SSH_KEY_PASSWORD}
              description: "SSH passphrase with private key file"
              privateKeySource:
                directEntry:
                  privateKey: ${SSH_PRIVATE_KEY}
LDAP Configuration
LDAP is yet another way of authenticating users. It is mostly used along with servers like OpenLDAP and Active Directory. In the Groovy script below, you can see the large number of parameters that need to be configured for LDAP.
import jenkins.*
import hudson.*
import hudson.model.*
import jenkins.model.*
import hudson.security.*

def env = System.getenv()

// LDAP configurations
def instance = Jenkins.getInstance()
def hudsonRealm = new HudsonPrivateSecurityRealm(false)
def server = "${env.LDAP_HOST}:389"
def rootDN = "${env.LDAP_ROOT_BIND_DN}"
def userSearchBase = "${env.LDAP_USER_SEARCH_BASE}"
def userSearch = "${env.USER_SEARCH}"
def groupSearchBase = "${env.LDAP_GROUP_SEARCH_BASE}"
def managerDN = "${env.LDAP_BIND_DN}"
def passcode = "${env.LDAP_BIND_CREDENTIALS}"
def inhibitInferRootDN = true

SecurityRealm ldap_realm = new LDAPSecurityRealm(server, rootDN, userSearchBase, userSearch, groupSearchBase, managerDN, passcode, inhibitInferRootDN)

instance.setSecurityRealm(ldap_realm)

instance.save()
It’s relatively easier to pass multiple parameters to the LDAP configuration in the YAML file:
jenkins:
  securityRealm:
    ldap:
      configurations:
        - server: ldap.acme.com
          rootDN: dc=acme,dc=fr
          managerDN: "manager"
          managerPasswordSecret: "${LDAP_PASSWORD}"
          userSearch: "(&(objectCategory=User)(sAMAccountName={0}))"
Slack Integration
Slack notifier integration, for publishing build status to the slack channels, is another task that is hugely different when you use Groovy script and YAML file.
import com.cloudbees.plugins.credentials.*
import jenkins.model.Jenkins

def env = System.getenv()

def slackParameters = [
  slackBaseUrl:             env.slack_base_url,
  slackBotUser:             env.slack_bot_user,
  slackBuildServerUrl:      env.slack_build_server_url,
  slackRoom:                env.slack_room,
  slackSendAs:              env.slack_send_as,
  slackTeamDomain:          env.slack_team_domain,
  slackToken:               env.slack_token,
  slackTokenCredentialId:   env.slack_token_credential_id,
]

// get Jenkins instance
Jenkins jenkins = Jenkins.getInstance()

// get Slack plugin
def slack = jenkins.getExtensionList(jenkins.plugins.slack.SlackNotifier.DescriptorImpl.class)[0]

// define form and request
JSONObject formData = ['slack': ['tokenCredentialId': 'slack-token']] as JSONObject
def request = [getParameter: { name -> slackParameters[name] }] as org.kohsuke.stapler.StaplerRequest

// add Slack configuration to Jenkins
slack.configure(request, formData)

// save to disk
slack.save()

jenkins.save()
The YAML equivalent of the above init script is a breeze:
credentials:
  system:
    domainCredentials:
      - credentials:
          - string:
              scope: GLOBAL
              id: slack-token
              secret: "${SLACK_TOKEN}"
              description: Slack token

unclassified:
  slackNotifier:
    teamDomain: <your-slack-workspace-name>
    tokenCredentialId: slack-token
As we just saw, we need to write a lot of hook scripts to configure all the necessary plugins. JCasC plugin considerably reduces the time and effort required to leverage the plugin features using the easily manageable YAML configuration file.
How to Structure JCasC YAML File
Let’s see how we can define the JCasC YAML file, which is referenced using the environment variable CASC_JENKINS_CONFIG. This will allow the Jenkins Configuration as Code plugin configuration-as-code:1.54 to find the config.yaml file.
Here is the final configuration setup of a YAML file:
jenkins:
  systemMessage: "This Jenkins is configured by single JCasC plugin"
  numExecutors: 1
  nodes:
    - permanent:
        labelString: "linux jenkins test"
        mode: NORMAL
        name: "utility-node"
        remoteFS: "/home/user"
        launcher:
          jnlp:
            workDirSettings:
              disabled: true
              failIfWorkDirIsMissing: false
              internalDir: "remoting"
              workDirPath: "/tmp"

  securityRealm:
    ldap:
      configurations:
        - server: ldap.acme.com
          rootDN: dc=acme,dc=fr
          managerDN: "manager"
          managerPasswordSecret: "${LDAP_PASSWORD}"
          userSearch: "(&(objectCategory=User)(sAMAccountName={0}))"
      cache:
        size: 100
        ttl: 10
      userIdStrategy: CaseInsensitive
      groupIdStrategy: CaseSensitive

  authorizationStrategy:
    globalMatrix:
      grantedPermissions:
        - "Overall/Read:anonymous"


credentials:
  system:
    domainCredentials:
      - credentials:
          - string:
              scope: GLOBAL
              id: slack-token
              secret: "${SLACK_TOKEN}"
              description: Slack token


unclassified:
  location:
    adminAddress: "jenkins@example.com"
    url: "http://jenkins.example.com/"
  slackNotifier:
    teamDomain: <your-slack-workspace-name>
    tokenCredentialId: slack-token

tool:
  git:
    installations:
      - name: git
        home: /usr/local/bin/git

jobs:
  - scripts: >
      folder(‘jobs’)

credentials:
  system:
    domainCredentials:
      - credentials:
          - basicSSHUserPrivateKey:
              scope: GLOBAL
              id: ssh_key_with_passphrase
              username: ${SSH_USERNAME}
              passphrase: ${SSH_KEY_PASSWORD}
              description: "SSH passphrase with private key file"
              privateKeySource:
                directEntry:
                  privateKey: ${SSH_PRIVATE_KEY}
Here are some of the elements used in the above config yaml file:
jenkins: Defines the authorization and clouds settings, system message, global properties, nodes, security realms, and views.unclassified: Other configuration, for example Slack integration.tool: Configuration for external tools, like git, allure, etc.credentials: Describes system credentials used for authentication against another application.
To explore further elements and their configuration, check out this link.
By using this simple YAML file, we can deploy Jenkins and access the dashboard as shown in the screenshot below.
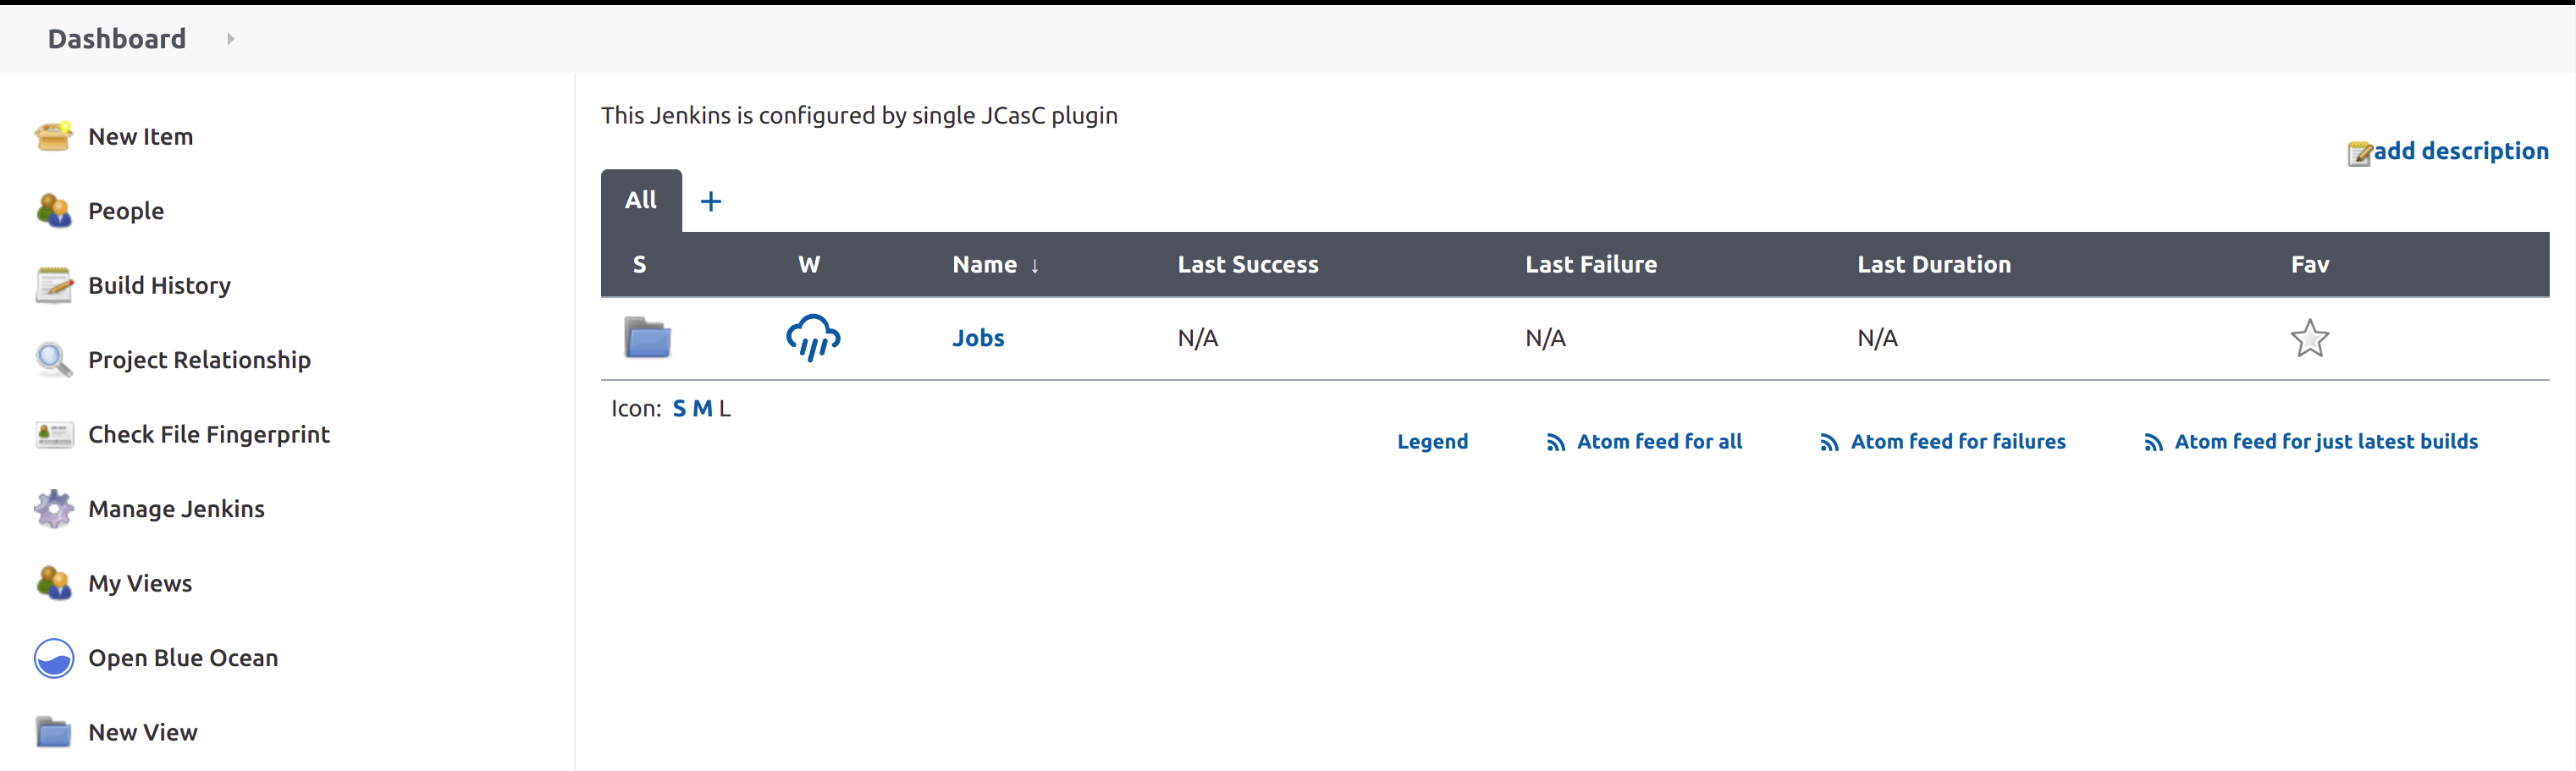
The systemMessage defined on the YAML file is reflected at the top of the dashboard. The folder jobs are created from the Groovy script mentioned in the jobs attribute.
How to Update Existing Jenkins Configuration Using JCasC
Any changes we make in the Jenkins system are automatically captured or reflected in the JCasC YAML file. For those changes to persist in the file system, follow the below steps:
- Download the configuration file by navigating to the Manage Jenkins option on the Dashboard.
- Click Configuration as Code under "System Configuration".
- Click Download Configuration. A file named
jenkins.yamlwill be downloaded in local. - Modify or make changes in your locally downloaded jenkins.yaml file.
- To reflect the changes in the
jenkins.yamlfile, upload the file path in the textbox and click Apply new configuration. It might take a few minutes to update the changes.

To Sum Up…
You can use the JCasC plugin to effortlessly execute common tasks like adding or managing SSH credentials, creating folders, and Jenkins jobs. With a human-readable YAML file, you can get things done faster.
So, yes, for DevOps engineers, a lifesaver, it is.