The OWASP Zed Attack Proxy (ZAP) is a popular open-source security tool for detecting security vulnerabilities in web applications during development and testing. Unlike Static Application Security Testing (SAST) tools, which analyze code without executing it, ZAP performs Dynamic Application Security Testing (DAST) by interacting with a running application.
Integrating ZAP into a CI/CD pipeline can be more complex than integrating SAST tools. It requires scripting automated actions and analyzing responses to detect potential vulnerabilities. This can be manageable for single-page APIs, but as the system grows in complexity, the process becomes more challenging.
Automating ZAP with Dockerized Scans
There are multiple ways to automate ZAP, using command line or dockerized scans. The dockerized scans are the easiest way to get started. They also provide more flexibility when it comes to integrating DAST into CI/CD.
The Dockerized ZAP container includes three primary scripts tailored for different testing needs:
- Baseline scan: A time-limited spider that does a passive scan
- Full scan: A comprehensive option that includes a full spider, an optional Ajax spider, an active scan, and a passive scan
- API scan: A full scan of an API defined using Swagger or GraphQL (post 2.9.0)
Setting Up ZAP in CI/CD Pipeline
Before we jump into the details, let's prepare a test environment for reference. For better flexibility, we can leverage an API Gateway, which supports multiple authentication mechanisms. If the APIs are defined with Swagger or GraphQL, you can generate a Swagger file for the API. ZAP can then use this file to perform an API Scan.
The authorization for the API gateway can be any of the following:
- Bearer Token: An HTTP authentication scheme that uses token-based credentials to access resources.
- API Key: A unique identifier used to authenticate and manage access to your APIs.
- Signed requests: A method of securely signing API requests using access keys to ensure the request's authenticity and integrity.
Basic Scan
The following commands can be used to perform a basic scan. These scans are suitable for applications with minimal or no authentication requirements; for example, single-page applications:
docker run -v “$(pwd):/zap/wrk/:rw” -i ghcr.io/zaproxy/zaproxy:stable zap-api-scan.py -t swagger.yaml -f openapi -r report_htmlOR
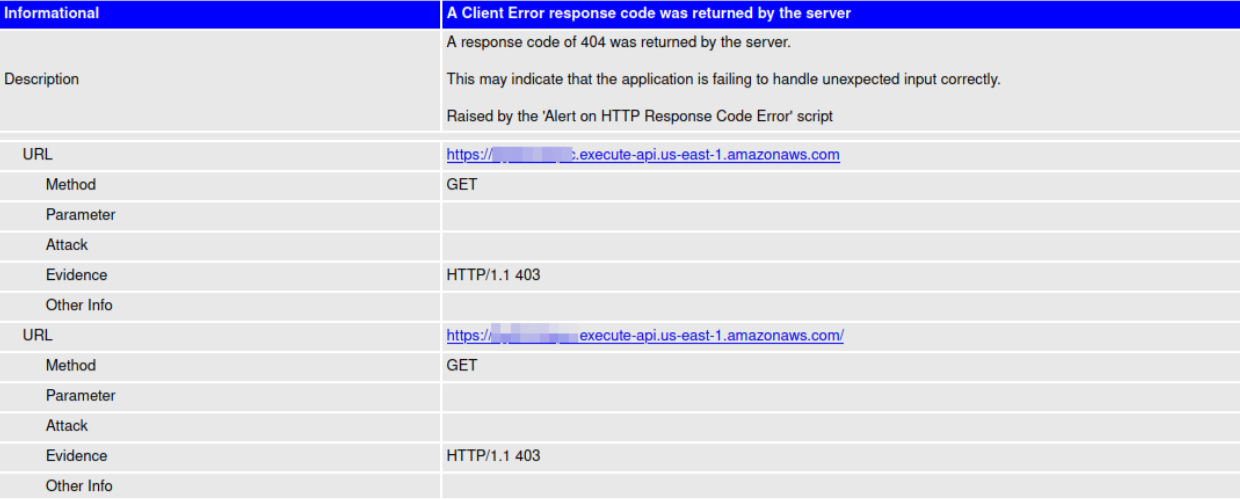
docker run -v $(pwd):/zap/wrk/:rw -t ghcr.io/zaproxy/zaproxy:stable zap-baseline.py -t https://www.example.com -r report_htmlBut for an application with any type of authentication, a basic scan will just return server error (403).

To perform an effective scan on applications with authentication, you must configure ZAP to handle authentication workflows. This article focuses on three types of authentication.
1. Bearer Token
The most common type of authentication is the Authorization header with the Bearer token. During the scan, ZAP sends a lot of requests to the target and every request should have the Authorization header for that to be a valid request.
First, a token has to be obtained and passed into ZAP. The below example shows how to obtain a token using username and password-based authentication with AWS Cognito.
curl -X POST https://cognito-idp.us-east-1.amazonaws.com/ -d '{"AuthFlow":"USER_PASSWORD_AUTH","AuthParameters":{"PASSWORD":"'"${PASSWORD}"'","USERNAME":"'"${USERNAME}"'"},"ClientId":"'"${COGNITO_CLIENT_ID}"'"}' -H "Content-Type: application/x-amz-json-1.1" -H "x-amz-target: AWSCognitoIdentityProviderService.InitiateAuth" -A "Mozilla/5.0 (X11; Linux x86_64; rv:60.0) Gecko/20100101 Firefox/81.0"Now that we have a valid token, we can proceed with a ZAP scan.
ZAP Configuration
Here is how ZAP handles basic authentication: ZAP uses contexts to group related URLs and apply shared settings such as authentication. This lets ZAP handle authentication automatically for all URLs in the group. However, for Dockerized packaged scans, defining a context with authentication is more difficult compared to using the ZAP UI or scripting. To simplify this, we manage the authentication manually.
For HTTP authentication, ZAP provides Authentication environmental variables, which allow us to easily add an authentication header to all the requests.
There are three main ZAP Authentication variables:
- ZAP_AUTH_HEADER_VALUE: This variable holds the value that will be added to the Authentication header of all requests.
- ZAP_AUTH_HEADER: If any header other than the common HTTP-Authentication header is used, this variable can be used to change the header name.
- ZAP_AUTH_HEADER_SITE: If this variable is set, only the sites mentioned in this variable will have the authentication header included.
Once these variables are set with the token, ZAP will run an authenticated scan and provide deeper and more accurate results. Without authentication, ZAP can only perform surface-level checks, missing vulnerabilities that require authentication to uncover.
Here’s the final command:
docker run \
	-e ZAP_AUTH_HEADER_VALUE="Bearer ${TOKEN}" \
-v “$(pwd):/zap/wrk/:rw” \
-i ghcr.io/zaproxy/zaproxy:stable \
zap-api-scan.py -t swagger.yaml -f openapi -r report_html
You know the scan was successful when you see this in your application:

2. API Keys
API keys are unique identifiers generated by the API provider to authenticate and track API usage. API Gateway services handle the creation and management of API keys. After creating an API key, we can send authenticated requests with that gateway by simply using the “X-API-Key” header in the request.
ZAP's Replacer feature allows us to easily add or modify headers dynamically, ensuring that the API key is included in every request sent during the scan. We can use the replacer to edit any of the following:
- Request header
- Request body
- Response header
- Response body
ZAP Configuration
To use the Replacer feature, we have to set these options: description, enabled, matchtype, match string, replacement string. While editing a request or response header, the replacer will add the header if it is missing in the actual request or response. An example of the configuration is given below.
-config replacer.full_list\\(0\\).description=handles authentication \
-config replacer.full_list\\(0\\).enabled=true \
-config replacer.full_list\\(0\\).matchtype=REQ_HEADER \
-config replacer.full_list\\(0\\).matchstr=Authorization \
-config replacer.full_list\\(0\\).replacement=123456789
The replacer functions as a list, as shown above. Each parameter is assigned a number, with its corresponding flags or values also marked using the same index. In the above example, the value of the Authorization header is replaced with the value “123456789”.
Now that we understand how the replacer works, let us see how the entire docker command looks. To make use of the replacer’s capabilities, we will add the “X-API-Key” header and replace the request user-agent.
docker run \
-v “$(pwd):/zap/wrk/:rw” \
-i ghcr.io/zaproxy/zaproxy:stable \
zap-api-scan.py -t swagger.yaml -f openapi -r report_html \
-z "-config replacer.full_list\\(0\\).description=useragent
    	-config replacer.full_list\\(0\\).enabled=true
    	-config replacer.full_list\\(0\\).matchtype=REQ_HEADER
    	-config replacer.full_list\\(0\\).matchstr=User-Agent
    	-config replacer.full_list\\(0\\).replacement='Mozilla/5.0 (X11; Linux x86_64; rv:60.0) Gecko/20100101 Firefox/81.0'
    	-config replacer.full_list\\(1\\).description=API-Key
    	-config replacer.full_list\\(1\\).enable=true
    	-config replacer.full_list\\(1\\).matchtype=REQ_HEADER
    	-config replacer.full_list\\(1\\).matchstr=X-API-Key
    	-config replacer.full_list\\(1\\).replacement=${API-KEY}
With that, every request will have the X-API-Key header with the API-KEY as its value. Also, every request’s user-agent header is set to the given value. Now you know how to bypass a WAF that blocks the ZAP requests based on user-agents.
3. AWS Signed Requests
AWS signed requests secure API calls to AWS by attaching a cryptographic signature, ensuring integrity, authenticity, and proper authorization. The signature is calculated using your AWS Secret Access Keys and specific components of the HTTP request, ensuring that the request cannot be altered or replayed by an unauthorized party.
When ZAP does a scan, it sends out hundreds of requests to the target. The challenging part here is that each request that the ZAP sends out has to be signed with the Secret keys. To address this, ZAP offers a powerful feature: helper scripts. ZAP’s community-powered helper scripts enable customization of various aspects of the scanning process, including modifying HTTP requests and responses, handling authentication and much more. These scripts can be written in Java, Python, Ruby, Node.js, or other programming languages.
ZAP Configuration
To make use of the helper script in ZAP, we have to make sure the corresponding add-on is installed before running the script. For example, jython for python scripts. The ZAP docker doesn’t have these add-ons pre-installed. To install the add-ons on runtime, we can make use of the zap.sh script inside the docker.
docker run -v “$(pwd):/zap/wrk:rw” -i ghcr.io/zaproxy/zaproxy:stable bash -c ‘zap.sh -cmd -addonupdate; zap.sh -cmd -addoninstall jython’The addonupdate parameter updates the addon repositories and the addoninstall parameter installs the add-on inside the docker.
The httpsender is the type of script that is required for our case. This has the ability to change every request and response. Thanks to the strong community support for ZAP, the script to sign requests with AWS Access Key and Secret key is already available. We just have to initialize this script to attach it with the ZAP scan. The script is available in the community script repository.
We need to make use of the signing script along with the httpsender type to sign all the requests that are sent by ZAP. Make sure you have a valid AWS Access Key, Secret Key, and Session token in the environment. To attach the script to ZAP, we need to first create a hook script and mention the signing script in it.
def zap_started(zap, target):
  		zap.script.load('aws-signing-for-zap.py', 'httpsender', 'jython', '/zap/wrk/aws-signing-for-zap.py')
  	zap.script.enable('aws-signing-for-zap.py')
Now let's save this as “SignRequests.py” and use the hooks feature in ZAP to complete the configuration.
docker run \
-v “$(pwd):/zap/wrk/:rw” \
-i ghcr.io/zaproxy/zaproxy:stable \
zap-api-scan.py -t swagger.yaml \
–hook=SignRequests.py -f openapi -r report_html
We can automate the addon installation and the ZAP scan with the following docker command:
docker run \
-v “$(pwd):/zap/wrk/:rw” \
-i ghcr.io/zaproxy/zaproxy:stable \
bash -c 'zap.sh -cmd -addonupdate; zap.sh -cmd -addoninstall jython;\
zap-api-scan.py -I -t swagger.yaml \
–hook=SignRequests.py -f openapi -r report_html’
Conclusion
Integrating ZAP for dynamic application security testing in CI/CD pipelines is challenging, especially as the complexity of the application increases. By automating the scripting of actions and analyzing responses, engineers can effectively identify and address potential vulnerabilities. Although the process may require additional effort and expertise compared to static analysis, the benefits of a secure application make it a worthwhile endeavor.


