


Rarely do we use proxies on our personal devices to access anything. But when you are developing an app for a client, and they want only whitelisted IPs to access their server, you will have to set up a proxy. You can set up a proxy for all network traffic or a specific set of network calls (for example, requests from within an app).
Let me walk you through the steps to configure proxy settings for your Mac or iPhone globally.
Mac Users
On Mac, you can set the proxy server from System Preferences, inside Network -> Advanced -> Proxies.

Enter proxy details such as:
- Proxy server IP address
- Port number
- User authentication, if required
Add these details to Web Proxy (HTTP) or Secure Web Proxy (HTTPS).
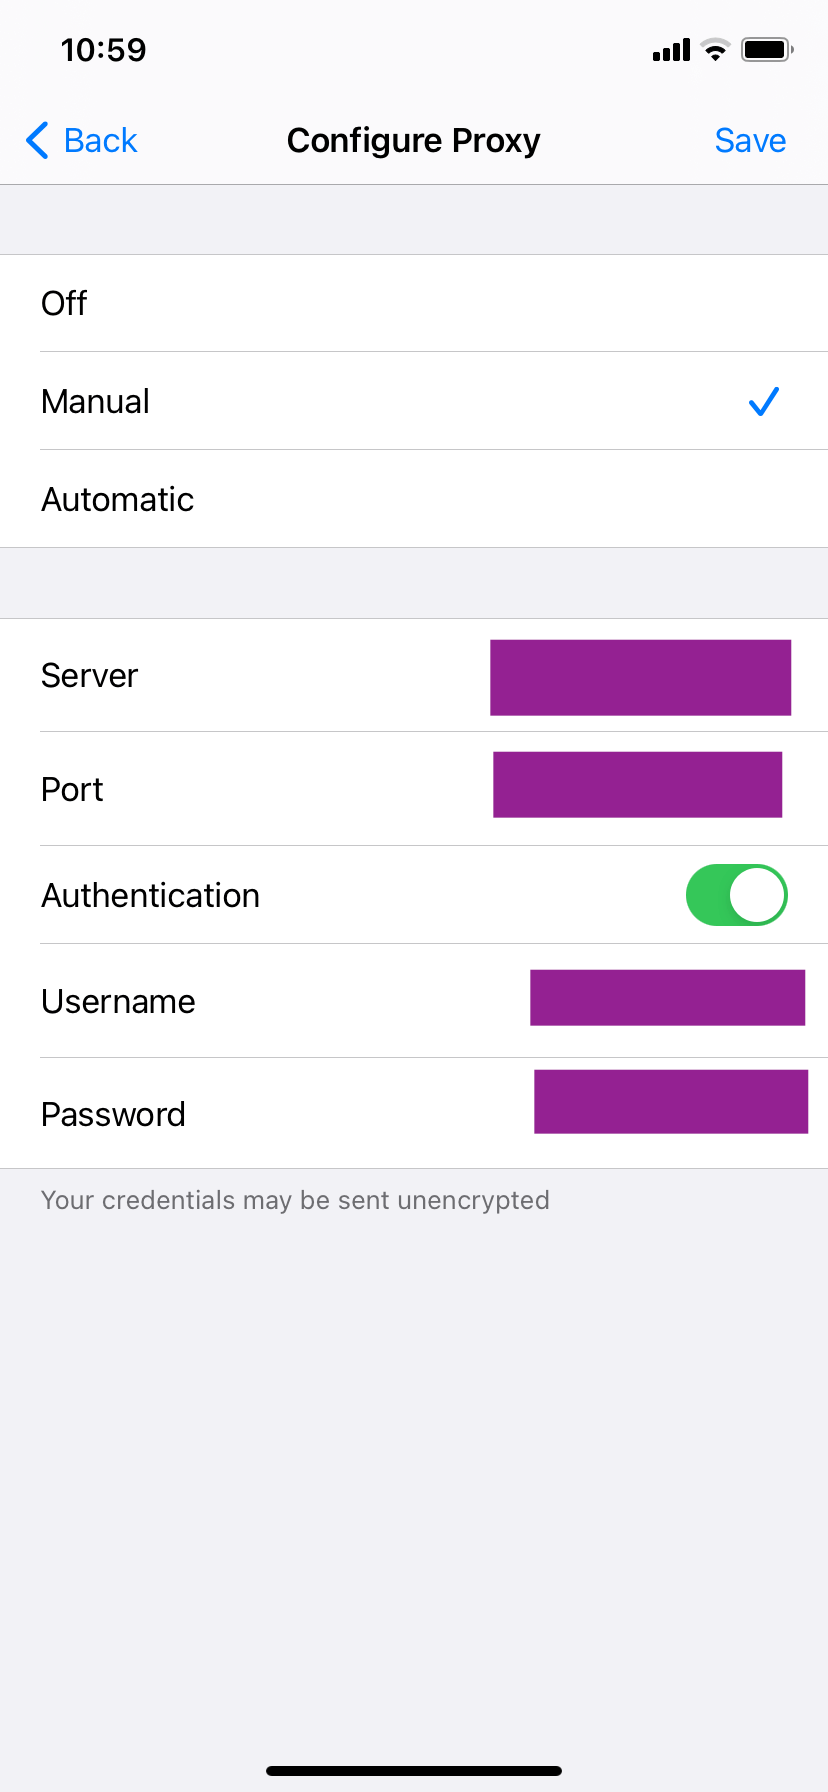
iPhone Users
Navigate to Settings -> WiFi and click the WiFi you’re currently connected to.
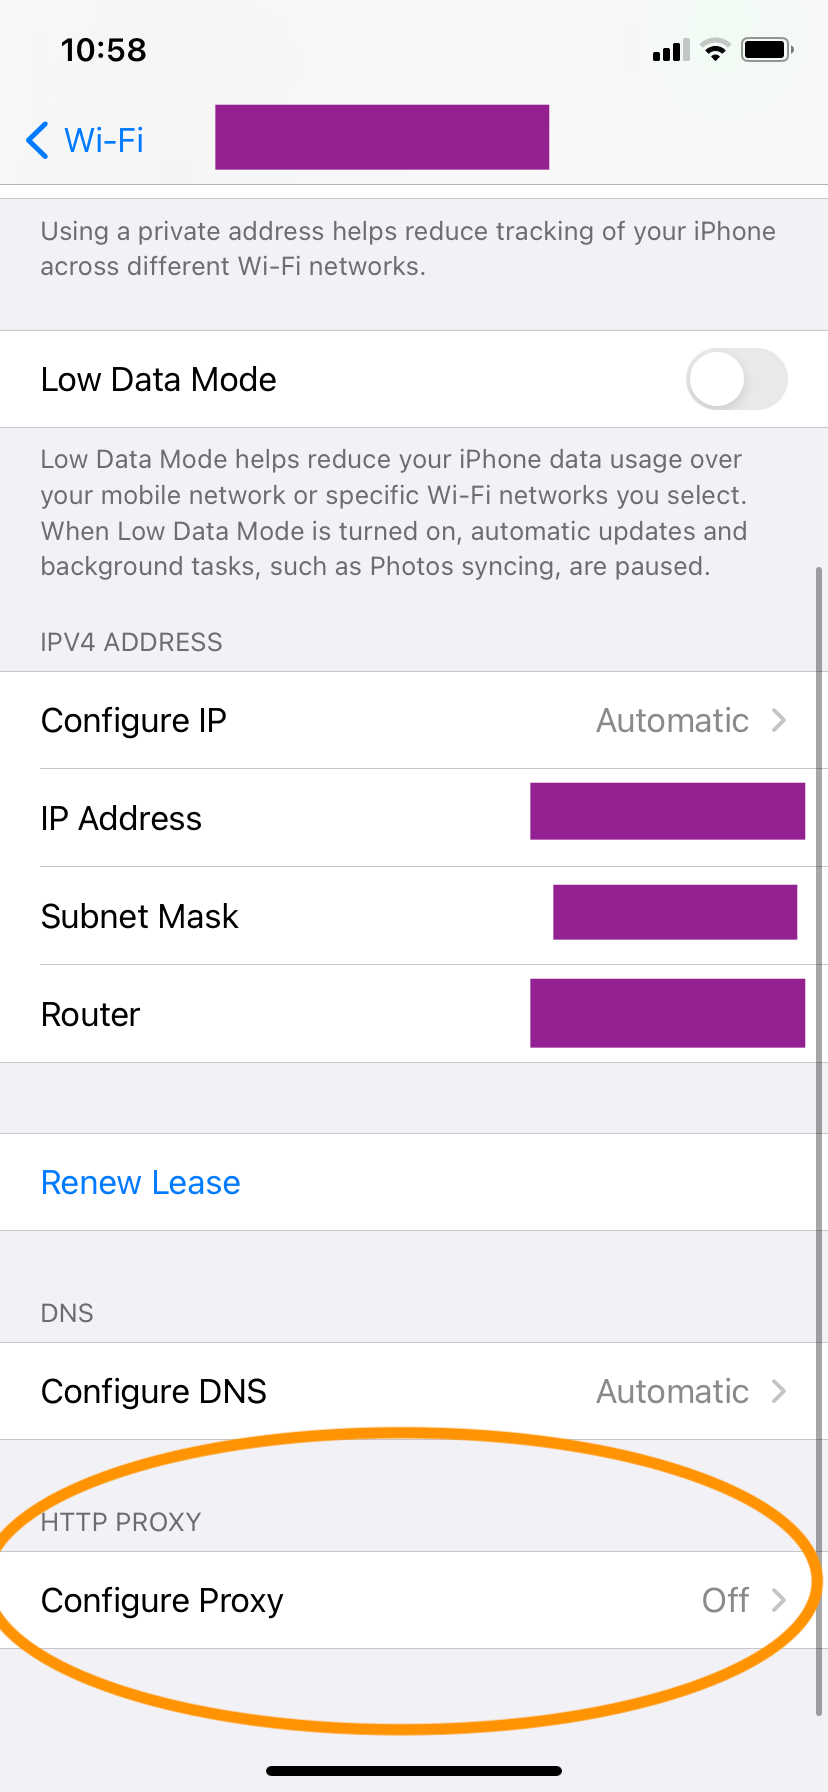
The Configure Proxy option will be Off by default. Change it to ‘Manual’. Enter the Server and port number here and user authentication details if any. Save the new settings.
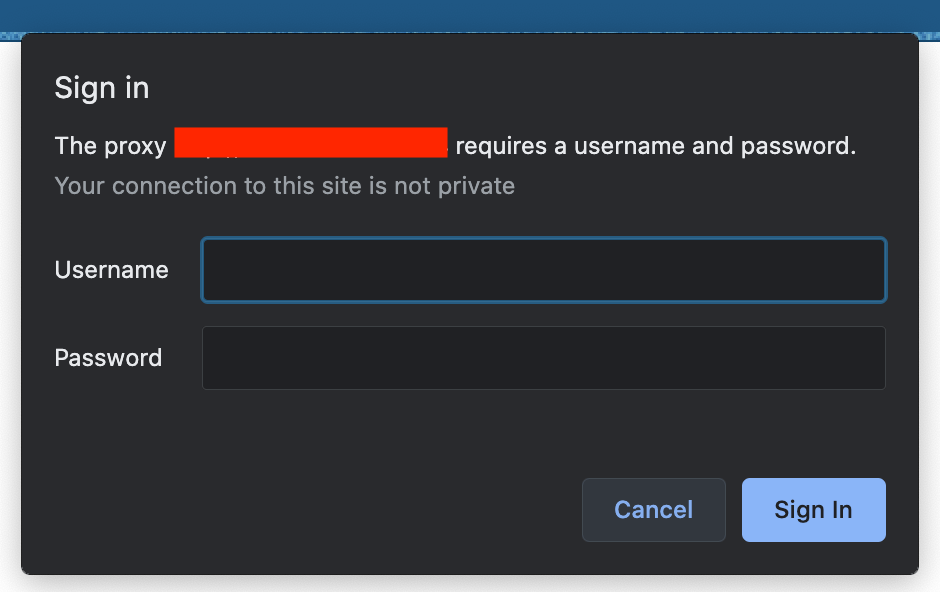
All Done! Or So it Feels…
The above setup sets the proxy server in your mac/phone alright, but then this process disables the usability of other apps inside your system, like chat, mail, etc. For these apps, you’re a new person now, and it just doesn’t trust you! So you would be faced with something like this:

When you’re constantly switching between Proxy On and Off modes while testing your app, you would end up wishing there was a way in which you could restrict the proxy settings for your app alone. Well, that is entirely possible.
How?
Use the Alamofire Session parameters. You can set the proxy values inside an URLSessionConfiguration object. Alamofire enables passing proxy configurations as a parameter named configuration to its session. This configuration parameter expects an URLSessionConfiguration object.
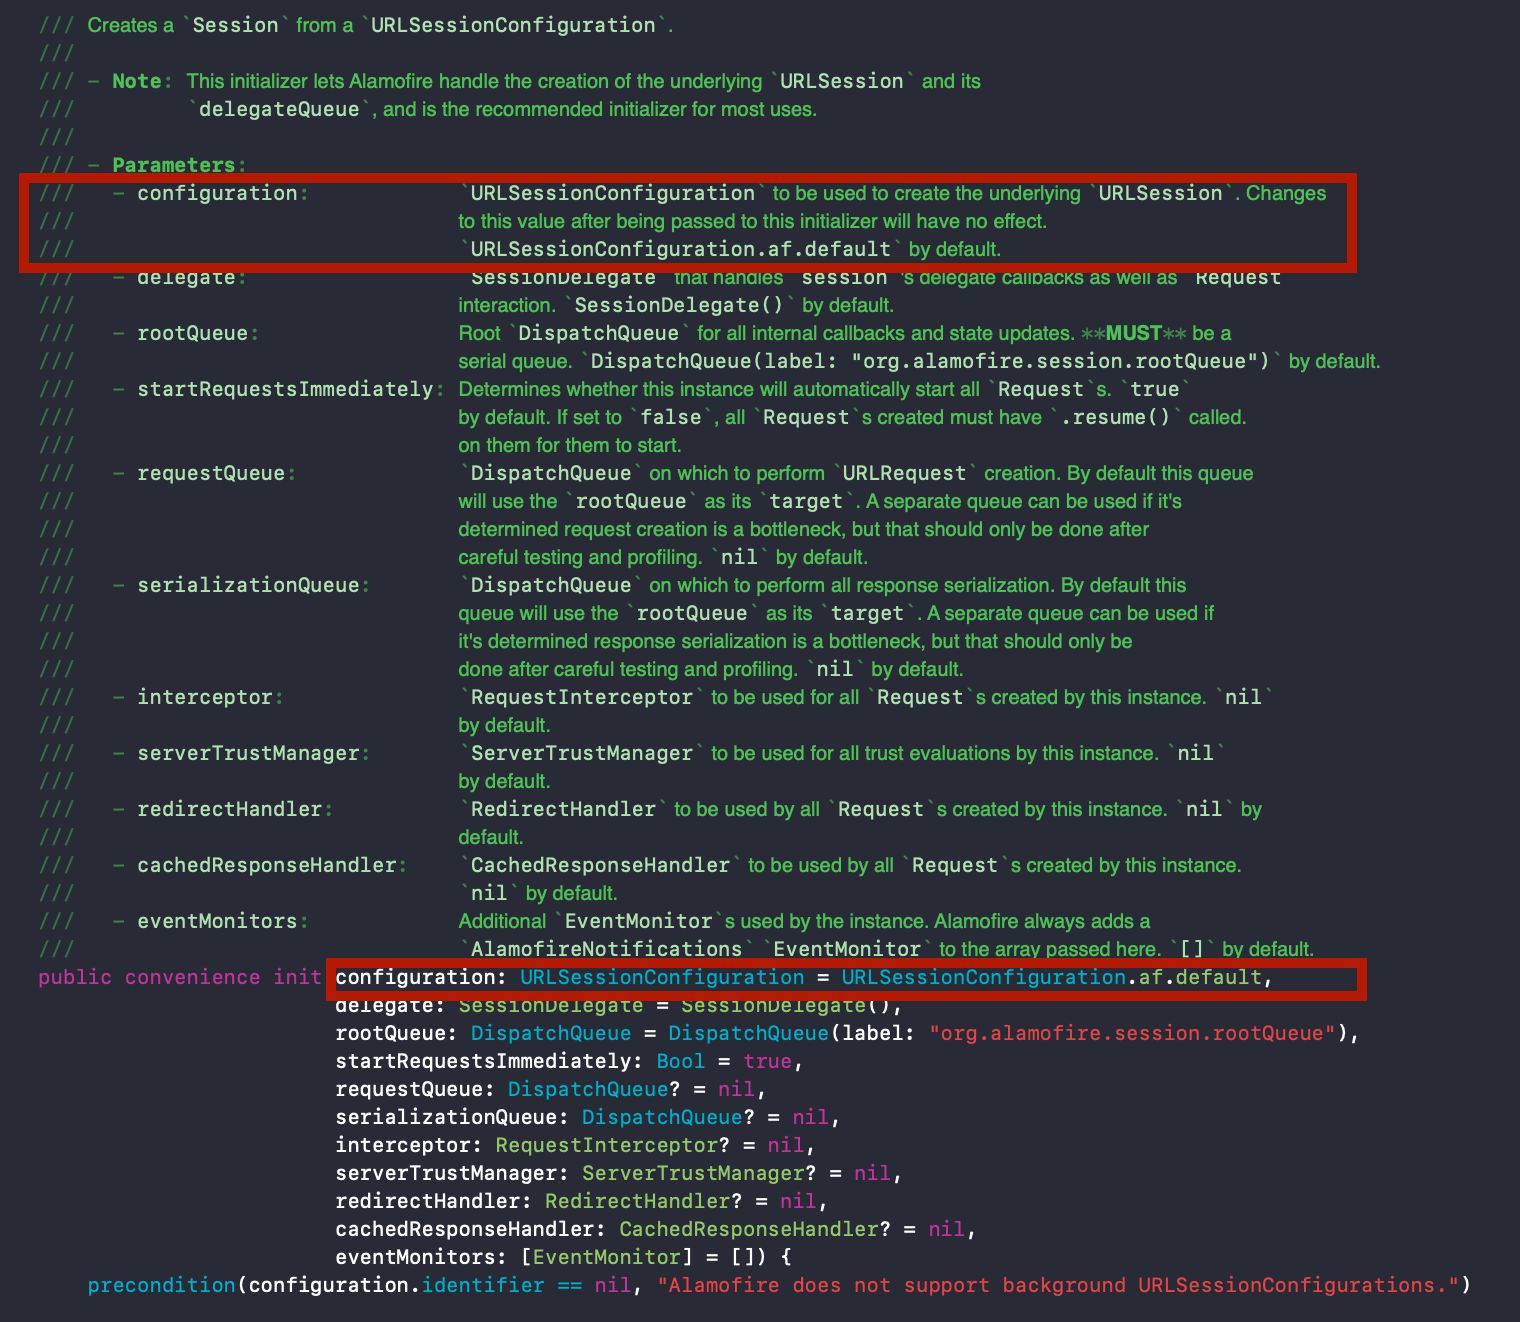
You can see the session initialization method definition. We’re interested in the selected parameter only. That’s where we are going to set our proxy server values.
Let’s start coding!
Let’s build up the URLSessionConfiguration object to be passed to the session. I’m creating a class named Proxy, which will have a function that creates our URLSessionConfiguration object. This function has input parameters as the host URL and port number (for example, 10.10.100.125:1234).
- We’re first creating a proxy dictionary. Inside that, we're specifying the HTTP Proxy hostname and port number and setting the HTTPEnable value to 1 to indicate True. You can omit this step if your proxy settings are for HTTPS only.
- We’re setting the HTTPS proxy hostname and port number. You can see that we’re specifying the keys as raw strings instead of using the defined key names. That’s because the key names are deprecated as of now. But we can still use the keys.
- We need to enter the authentication username and password if your proxy settings require basic authentication. Skip this step if it’s not needed. With this, we’ve created our proxy dictionary with the required details.
- This creates the default
URLSessionConfigurationobject. If the proxy settings use basic authentication, you have to add the username and password as HTTP header values. - Set the created proxy dictionary to the
connectionProxyDictionaryparameter of theURLSessionConfigurationobject. This parameter now holds all the proxy server values that we’ve passed.
With this, we’ve generated the code for creating the required URLSessionConfiguration object. Now we need to use it. Inside your base network layer code where Alamofire is getting used, you just need to pass this newSession function in the configuration parameter of the session creation code.
Now run your app!
What happens? You could encounter the following error:
The certificate for this server is invalid. You might be connecting to a server that is pretending to be “xx.xxx.xxx.xxx” which could put your confidential information at risk.” UserInfo={NSLocalizedRecoverySuggestion=Would you like to connect to the server anyway?, _kCFStreamErrorDomainKey=3, NSErrorPeerCertificateChainKey=(“<cert(0x7ffeb2889600) s: xx.xxx.xxx.xxx i: mitmproxy>”,“<cert(0x7ffeb289e400) s: mitmproxy i: mitmproxy>”
Your firewall is trying to warn you about the proxy settings, which is a good thing because now the network is aware of the proxy server. But we have to bypass this error. If this was happening in a browser, you’d get the prompt: 'Would you like to connect to the server anyway?'. But since this is coming as an API response, it’s not possible to handle it at this stage once we’ve received the response.
So what can we do to bypass this? By telling the network beforehand not to add this check for this server. In Alamofire, this check is handled by an entity called serverTrustManager. To ensure that the above check is disabled for our proxy server, we need a trusted evaluator with options as DisabledTrustEvaluator:
and this is passed in the session initiation code:
Run your app, and you can see the right response received from your server for the API you fired. Now your code is configured to have an inbuilt proxy setting with bypass check disabled.
Congratulations! Now your app is ready with inbuilt proxy settings.
Take it a step further…
You can make it more user-friendly by taking the proxy settings as input from the user. For this, you just need to add an intake form/pop-up to collect the proxy settings from the user in your app and feed those values into your code. It would be more elegant and would reduce the dependency on another build when proxy settings are changed.