In Part 1 of this series, we learnt how to set up a Hadoop cluster on Azure HDInsight and run a Spark job to process huge volumes of data. In most practical scenarios, however, such jobs are executed as part of an orchestrated process or workflow unless the need is for a one-time processing. In our specific use case, we had to derive different metrics related to error patterns and usage scenarios from the log data and report them on a daily basis.
In Part II, we will take a look at how to use Azure Data Factory to orchestrate and schedule data extraction from Azure Table storage, analyze data using Spark on Azure HDInsight cluster and store the processed data in an Azure SQL database. As mentioned in the first part, we will be using a stripped-down version of the script for the sake of clarity, as our core focus will be on the overall orchestration of the process and not the specifics of the job.
1. Setting Up Azure Data Factory
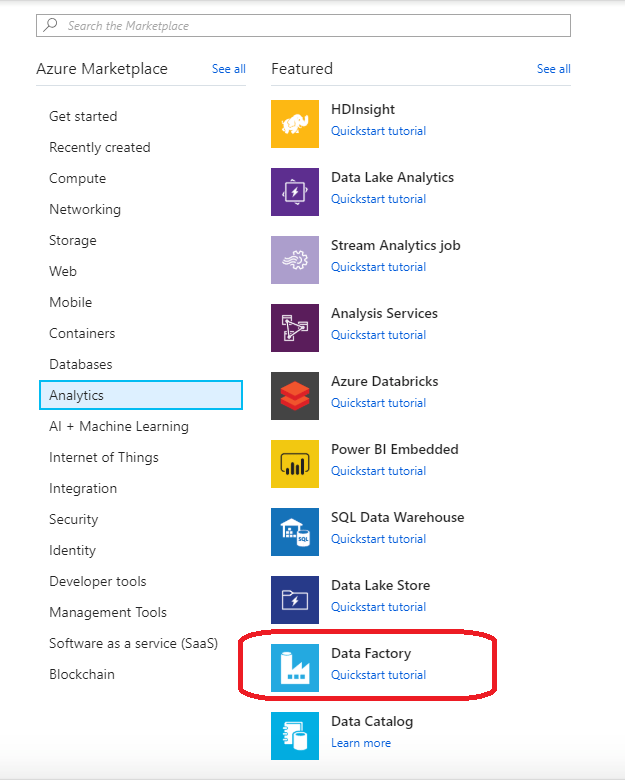
For setting up an instance of Azure Data Factory, log into the Azure portal and choose
Create a resource and select
Data Factory under
Analytics.
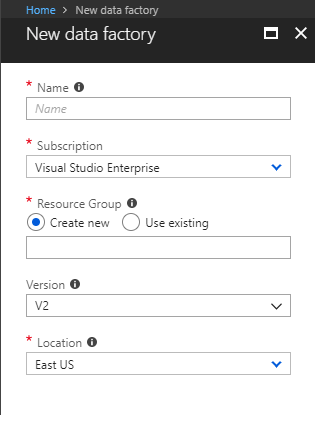
 This should take us through a simple screen to capture the data factory instance name, version and location, as shown in the below screenshot. Ensure that V2 is selected for the version, while creating the data factory instance.
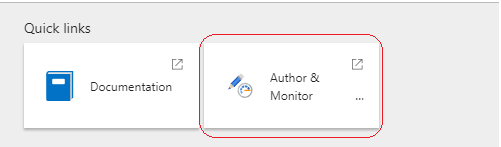
 Once the instance is provisioned, click the Author and Monitor option on the Data Factory instance page to proceed with the setup.
 This should open up a new tab in the browser.
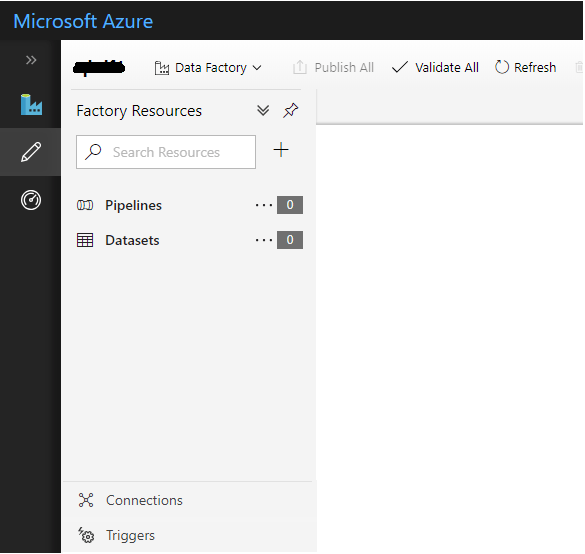
 Choose the Author option from the left-side menu, which should bring up the pipeline designer interface as shown below.
 Creating an orchestration workflow in Data Factory is a three-step process:
- Creating connections to read or write from data sources. An example of this will be a connection to an SQL database or an Azure Blob storage container.
- Creating datasets that will read or write data to specific instances using the connections created in the previous step. In our example, a table in a SQL database or a folder location/file in a storage container will be a dataset. Each table or file that we want to read/write to will have to be created as a separate dataset.
- Creating pipelines using available (or custom-built) activities that can process the datasets. A pipeline may be considered as a workflow that can read, write, and process data using the datasets created.
We will have a look at each of the above steps in detail for the log data processing pipeline we are developing.
2. Setting Up Connections
The application under consideration uses Azure Table storage to persist the log data. We will need to extract and parse the data from Azure Table storage and save it in an Azure blob storage container, from where the Spark job will pick it up for processing. The processed data will then be saved to an Azure SQL database for final reporting purposes. Hence we need to create linked service to connect to Azure Table storage, Blob storage, and an Azure HDInsight cluster.
2.1 Azure Table Storage Connection
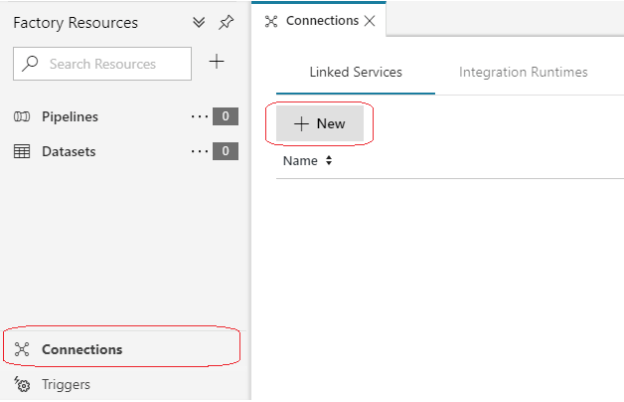
- Select New from the Linked Services option under Connections.
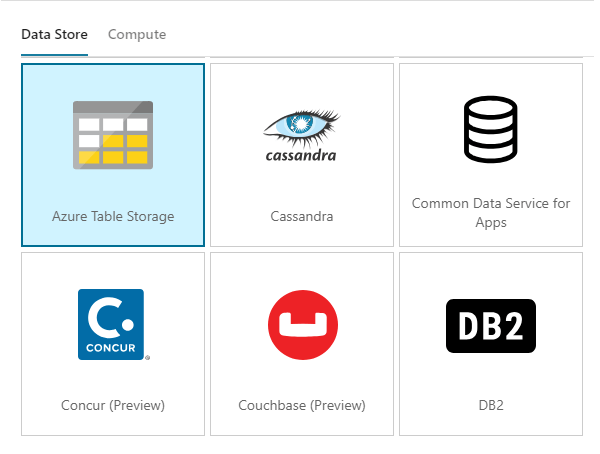
- Select Azure Table storage option under Data store in the side bar that pops up and click Continue.
- Enter the name and connection string details (which can be either entered manually or chosen from the existing subscription) for connecting to the Azure Table storage.

- Test the connection. If there are no errors, click Finish.
2.2 Azure Blob Storage Connection
We will repeat the steps as in the Table Storage connection setup mentioned above, except that this time we will choose Azure Blob storage as the Data store while creating the linked service connection and provide connection string details.
2.3 Azure HDInsight and SQL Server Connection
We will follow a similar process to create connections to Azure HDInsight and Azure SQL DB as well, by providing appropriate connection information.
3. Creating Datasets
Once we have created the connections and tested them against different data stores and compute instances required for our workflow, we will next create datasets to read or write data from specific instances of the data stores using the connections already created.
3.1 Azure Table Storage Dataset
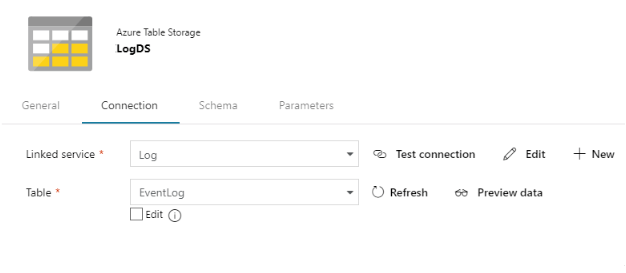
This dataset will be used to connect to the Azure Table storage instance where the application log data is saved. We will name the dataset as LogDS and select the Azure Table storage connection created earlier, in the Connection settings tab as shown below. This will allow us to connect and choose the Table instance that we are interested in.
 In the Schema settings, we will perform an import schema and select only the fields that we want to extract from the Table storage.

3.2 Azure Blob Storage Dataset
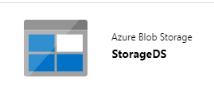
Blob storage will be used to store the file containing the data read from the Table storage so that the Spark job can read and process the data. The processed output data from the Spark cluster will also be saved back to the Blob storage but to a different path within the same container. We have to create two different datasets to read from these two different storage paths using the same underlying connection since the storage account remains the same. We will name the input folder dataset as StorageDS.
 Let’s name the output folder dataset as StorageOutputDS.
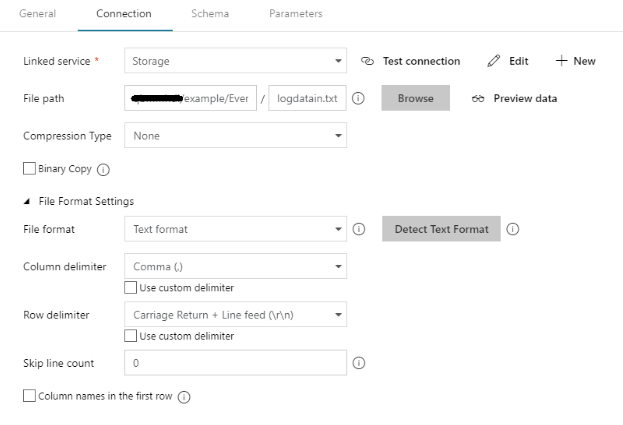
 First, we will create the StorageDS dataset for the input file. We will specify the file path of the storage container and the file name. We also have the provision to specify the file format, row, and column separator of the file as shown below. We have specified logdatain.txt as the file name with “,” as the column separator, as shown below.
 Next, we will create the second storage dataset named StorageOutputDS to point to the Blob storage folder where the processed output files will be generated by the Spark job. This dataset will be used to read the output files generated by the Spark job during later stages in the pipeline.
 You can see that we have provided a dynamic expression for the file path as well as the file name. The Spark job generates the output files in a folder with name as current date formatted in MDYYYY format (Eg6232018 for June 23, 2018). The Spark job will write multiple files to the folder with the naming convention as part-00000, part-00001 and so on, and hence a dynamic expression has to be provided to read data from all the files that has a name that starts with ‘part-’.
3.3 Azure Database Dataset
In the last step of the workflow, we will save the output data generated by the Spark job into an Azure SQL database. For this, we will now create a dataset to point to the specific table in the SQL database.
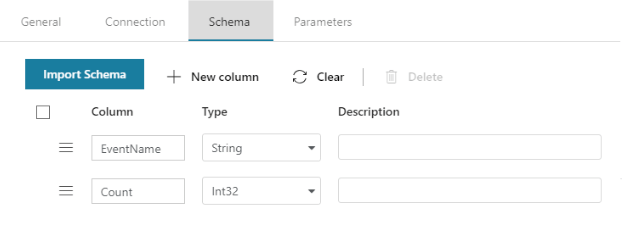
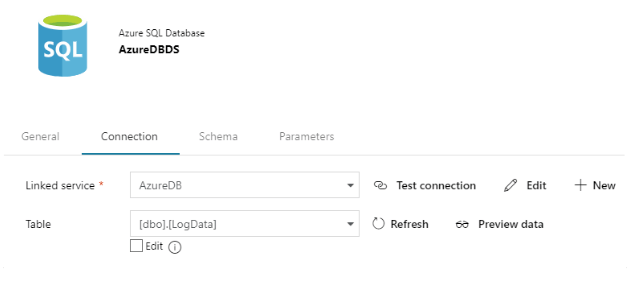 We will also provide information about the schema of the table in the target database (this can be generated automatically using the Import Schema option).
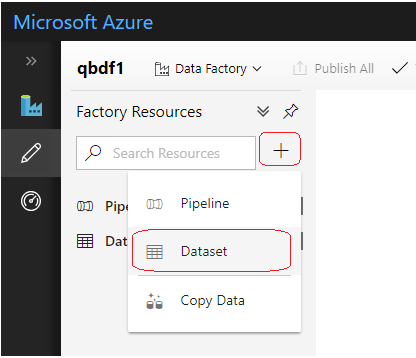
4. Creating the Pipeline
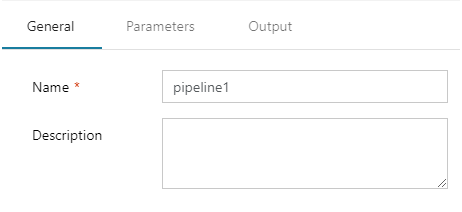
This is where the different processing steps to be performed on the datasets are orchestrated as a workflow and the final processed data is pushed to its destination. We will use the new Pipeline create option and provide a name for the pipeline in the designer window that comes up.

 Select and add the activities required for the pipeline from the Activities bar on the left side of the designer.
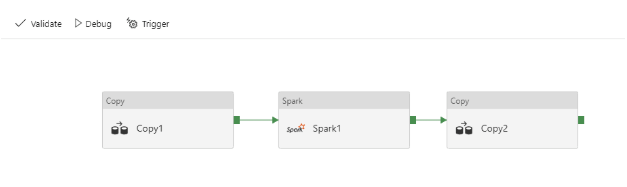
 Add two instances of the Copy activity from the Data flow group and one instance of Spark from the HDInsight activity group. Define a pipeline as shown in the screenshot below, by connecting the success output of one stage to the next. This will ensure that the pipeline fails and halts anytime there is a failure in one of the stages.
4.1 Copy Activity
The first copy activity is expected to extract the data from the Table storage and store it in a Blob storage location from where the Spark job can read it (inputfile). The job will process it and have the processed data stored in another location on the Blob storage (outputpath). The final copy step will read the processed data from the files in the output path and store it in an SQL database.
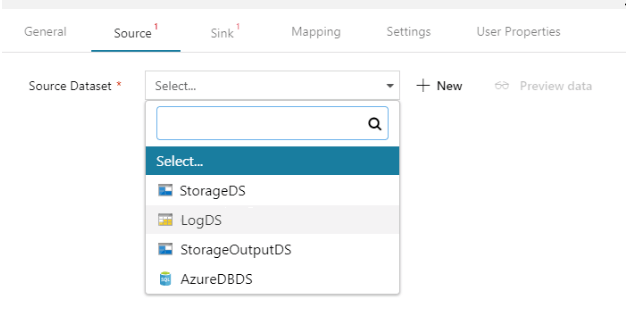
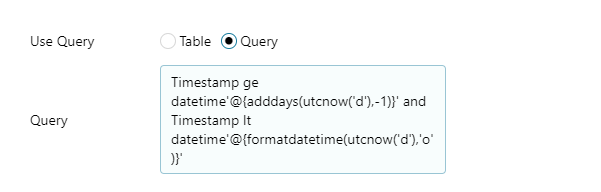
Let’s start with configuring the attributes for the different activities in the pipeline. Click the first copy activity to have its properties displayed and provide values for Source and Sink. Choose the LogDS dataset created earlier as the source dataset. Provide a query to filter out the data for the previous day from the logs, as the application is expected to run on a daily basis.
In the
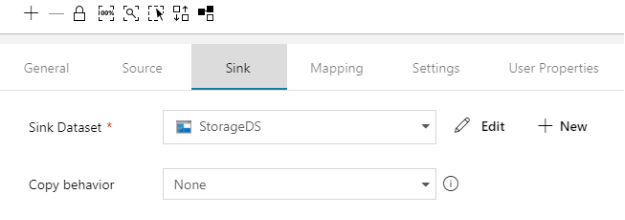
Sink tab, choose the storage container dataset that points to the input file path of the Spark job (StorageDS). This will ensure that the copy activity will copy the log data based on the query provided and save it to a file in the location where the Spark job expects it.
4.2 Spark Activity
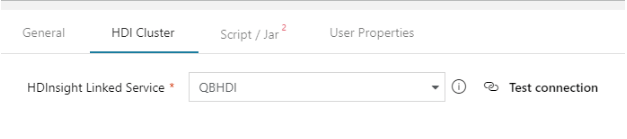
For the Spark activity, we will select the HDInsight linked service connection (created while setting up the connections) in the HDI Cluster tab, so that the activity knows which cluster to use for processing the job.
 We will also provide details of the Spark job script path in the Script / Jar tab and specify the arguments expected by the script using the Arguments entry field, as shown in the below screenshot. Notice that we have provided the inputfile and outputpath as arguments to the script. The inputfile path provided should coincide with the file path set in StorageDS dataset, as the preceding Copy activity writes the output to the location specified in the StorageDS dataset.
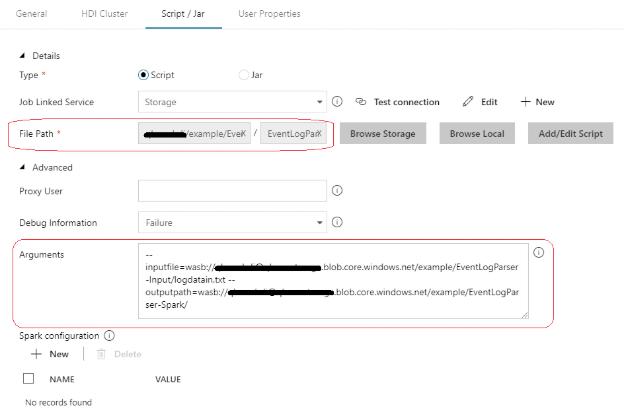 Notice that the path arguments to the script ( --inputfile and --outputpath) are all pointing to paths in the storage container, as the distributed nature of the Spark job requires its input and output to be read from or written to a Hadoop-based distributed file system (HDFS). Wasb(s) or Windows Azure Storage Blobs is an HDFS abstraction protocol for Azure Blob storage.
Finally, before we move onto the next activity in the pipeline, it’s worth mentioning one of the cool features available as part of this activity: the ability to edit the script to make any quick corrections (or even add a new script entirely) directly from this interface using the Add/Edit Script button.
Notice that the path arguments to the script ( --inputfile and --outputpath) are all pointing to paths in the storage container, as the distributed nature of the Spark job requires its input and output to be read from or written to a Hadoop-based distributed file system (HDFS). Wasb(s) or Windows Azure Storage Blobs is an HDFS abstraction protocol for Azure Blob storage.
Finally, before we move onto the next activity in the pipeline, it’s worth mentioning one of the cool features available as part of this activity: the ability to edit the script to make any quick corrections (or even add a new script entirely) directly from this interface using the Add/Edit Script button.
4.3 Final Copy Activity
The final copy activity reads the processed output data of the Spark job from the ‘outputpath’ and saves it into an Azure Database, for which we will configure the Source and Sink as shown below.
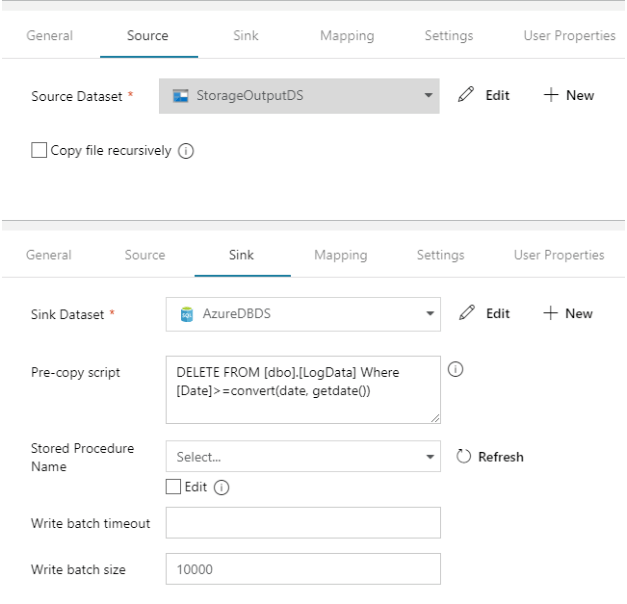 We have provided a pre-copy script in the Sink tab to prevent any duplicate data going to the DB for the same day. This is done as a preventive measure to avoid any data inconsistencies that could arise out of having to run the script repeatedly for the same day.
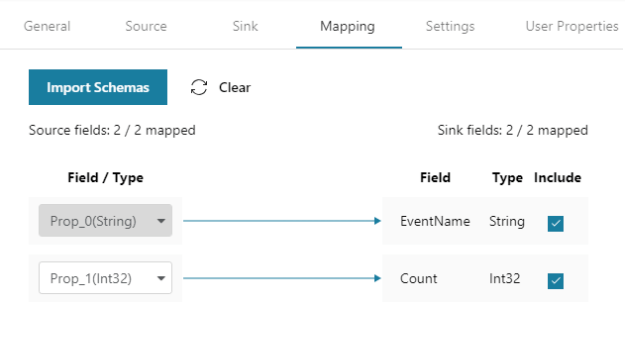
We will also provide a mapping of the source fields to the corresponding fields in the target table.
We have provided a pre-copy script in the Sink tab to prevent any duplicate data going to the DB for the same day. This is done as a preventive measure to avoid any data inconsistencies that could arise out of having to run the script repeatedly for the same day.
We will also provide a mapping of the source fields to the corresponding fields in the target table.
5. Publishing and Testing
Now that we have set up the pipeline, we will publish it to proceed with the testing. Use the Publish All button to deploy the changes.
 Use the Debug option to quickly verify if the pipeline is working fine.
 Upon successful running of the pipeline, you will get the output shown below. If there are errors in any activity during the pipeline execution, it will be shown against the corresponding activity as ‘failed’.

6. Scheduling the Pipeline
To trigger the pipeline on a daily basis, we can use the New Trigger option and create a schedule as required.
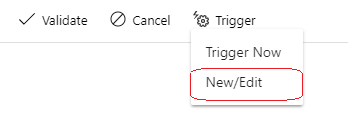 The figure below shows a trigger created to execute the pipeline daily at 1:00 AM UTC.
 So far, we have explored how Azure Data Factory pipelines can be leveraged to orchestrate and schedule big data processing activities using Spark jobs on Hadoop clusters. Though we have used Python as the scripting language for developing the Spark jobs, Data Factory also provides full support for executing Spark jobs written in Java or Scala, bundled as a JAR package.
One of the areas that we have intentionally left out in our discussion so far is how we can effectively debug the Spark jobs in case of failure arising as a result of an issue within our script or otherwise. We will keep that as a topic for a future blog. Till then, happy coding!
So far, we have explored how Azure Data Factory pipelines can be leveraged to orchestrate and schedule big data processing activities using Spark jobs on Hadoop clusters. Though we have used Python as the scripting language for developing the Spark jobs, Data Factory also provides full support for executing Spark jobs written in Java or Scala, bundled as a JAR package.
One of the areas that we have intentionally left out in our discussion so far is how we can effectively debug the Spark jobs in case of failure arising as a result of an issue within our script or otherwise. We will keep that as a topic for a future blog. Till then, happy coding!