In a previous blog post, we explained how you can use PySpark CLI to jumpstart your PySpark projects. Here, I’ll explain how it can be used to build an end-to-end real-time streaming application.
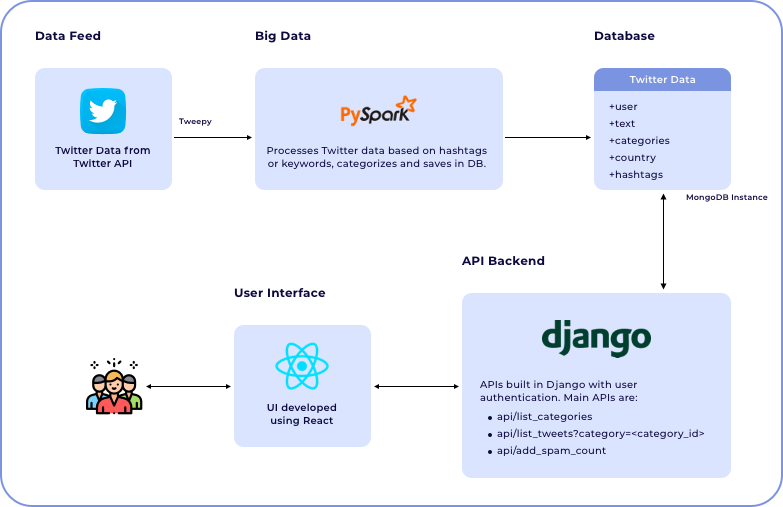
The platform that I’m about to discuss here was created to help understand global trends related to Covid-19, the biggest health crisis of our lifetime. It collects Twitter data related to Covid-19 based on hashtags, categorizes them into new infections, deaths, recovered cases, vaccines, etc., based on custom logic, and saves them in MongoDB. The APIs for accessing the Twitter data are written in Django and the UI is developed using React. In the end, we’ll have a single-page application with tweets that are updated every minute. For listening to Twitter API, I have used Tweepy, an open-source PyPI package.
You can use this platform to create custom categories with a set of hashtags to identify Twitter data relevant to your campaign or research interest.
Technologies Used
- PySpark for big data processing
- Django for API implementation
- React for frontend
Backend APIs
- api/list_categories
- api/list_tweets?category=<category_id>
- api/add_spam_count
Implementation Plan
- Develop a PySpark streaming project to categorize tweets
- Save data in MongoDB and visualize data using a web platform
- Add functionality for users to report tweets on the platform
Setting Up the Project
Let’s create the initial structure for our streaming project using PySpark CLI. We can use the pysparkcli create command to do that.
I used the following command to create the project-covidTDP (Covid Twitter Data Platform) with Twitter streaming template:
pysparkcli create covidTDP -m ‘local[*]’ -c 2 -t streaming
It gives the following message:
Using CLI Version: 1.0.3
Completed building project: covidTDP
Let’s check the generated folder structure using the following command:
➜ tree covidTDP
covidTDP
├── __init__.py
├── requirements.txt
├── src
│ ├── app.py
│ ├── configs
│ │ ├── __init__.py
│ │ ├── spark_config.py
│ │ └── stream_source_config.py
│ ├── __init__.py
│ ├── jobs
│ │ ├── __init__.py
│ │ └── transformation_job.py
│ ├── settings
│ │ ├── default.py
│ │ ├── __init__.py
│ │ ├── local.py
│ │ └── production.py
│ └── streaming
│ ├── __init__.py
│ └── twitter_stream.py
└── tests
├── __pycache__
│ └── test_stream.cpython-36.pyc
└── test_stream.py
7 directories, 17 files
Now the initial project structure is ready.
Project Coding Explained
It's time to dive into the code and get our hands dirty.
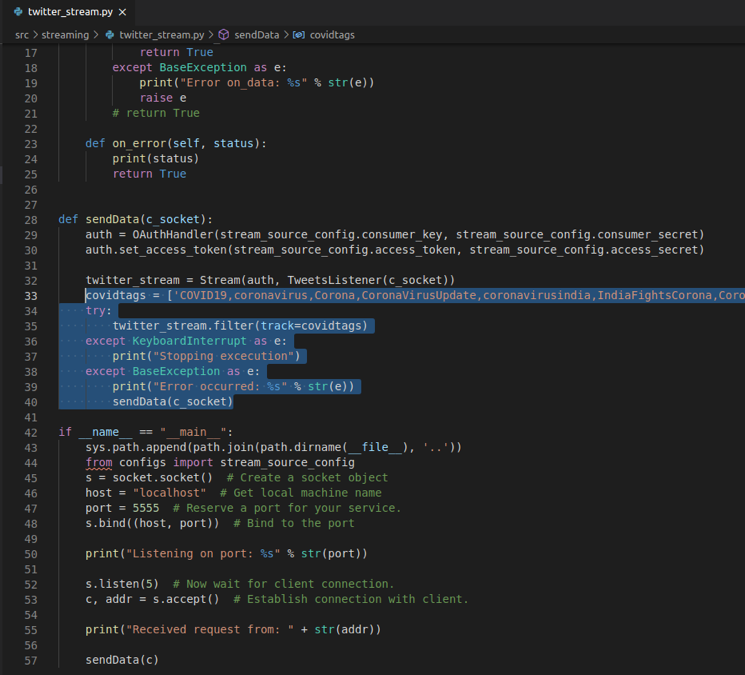
- For this project, we need to fetch all the tweets related to Coronavirus and Covid-19. To do that, we need to put hashtags such as #corona, #covid19, etc. in the twitter_stream.py file in the generated project for our streaming pipeline to pull data from Twitter. You can find the file at the path covidTDP/src/streaming/twitter_stream.py.
In our case, there are lots of hashtags to add. So we went with a Python List and assigned the list variable. Check the raw code here.
2. The next step is to transform the tweet data coming in the Spark streaming feed.
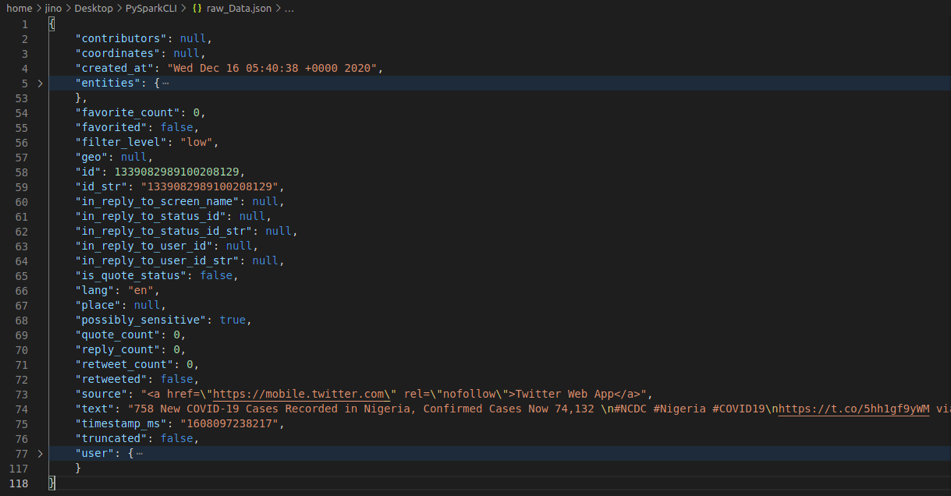
We will be transforming the above data into the following JSON format before saving it to MongoDB.

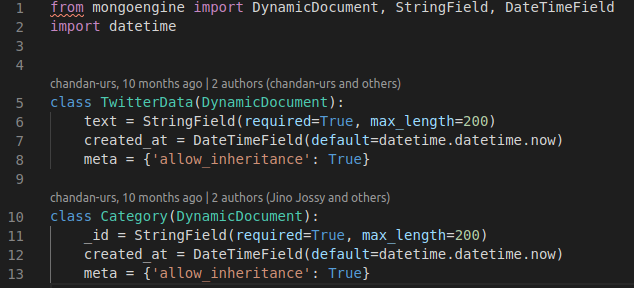
3. Now we need to set up a database to save the data. For this project, I used MongoDB and for hosting, I used AWS EC2 instances. To save this to MongoDB, you need to create a MongoDB model. I created the following model for saving Twitter data. See the model here in code.
4. Now let's modify the app logic to transform Twitter data and save it to MongoDB cluster. It's time to examine app logic in depth. We will go based on how the code logic is working when we call pysparkcli run project command.
In the main app file, the code execution starts at the code block shown below. The df variable is the data frame where all the data from the Twitter stream is read.
if __name__ == "__main__":
   df = spark_config.spark \
           .readStream \
           .format("socket") \
           .option("host", spark_config.IP) \
           .option("port", spark_config.Port) \
           .load()

   transform = df.writeStream\
           .foreach(saveMongo)\
           .start()
The awaitTermination is to wait on the write stream until an interrupt signal is initiated.
transform.awaitTermination()
The function given below will take data as input and transform it to the expected format.
def saveMongo(data):
   data = loads(data.asDict()['value'])
   text = data.get("text", '--NA--')
   print("Processing data from user:"+data.get('user',{}).get('name', '--NA--'))
Here we’ve added checks for the following:
- Retweets that contain RT @.
- Tweets with empty texts (yes, that happens!).
- Texts containing a set of keywords that we have used within the code.
 if not text.startswith("RT @") and filterKeyword(text) and "retweeted_status" not in data.keys() and text != '--NA--':
       hashtags = data.get('entities', {}).get('hashtags', [])
       if filterHash(hashtags):
Here we are creating the MongoDB client to save the new data to the cluster:
 db_client = connect(
               db=DB_NAME
           )
Preparing the categories from the text:
categories = getCategory(text)
           cat_objs = Category.objects.in_bulk(categories)
Here we have custom logic to identify newly coming categories and save them in MongoDB.
for cat_name in list(set(categories) - set(cat_objs)):
               category = Category(_id = cat_name)
               category.save()
Now we are ready to save Twitter data in MongoDB.
 tweet = TwitterData(text=text)
           tweet.hashtags = [hashtag["text"] for hashtag in hashtags]
           tweet.user = data.get('user')
           tweet.country = getCountry(text)
           tweet.category = categories
           tweet.url = "https://twitter.com/user/status/" + data.get("id_str")
           tweet.save()
Time to close the MongoDB connection. We don’t want a lot of connections to crash our server.
db_client.close()
Steps to take before running the project:
- Copy utils folder to covidTDP folder.
- Copy requirements file.
- Make sure JAVA_HOME is configured with /usr/lib/jvm/java-8-openjdk-amd64.
- Install MongoDB.
- Install npm.
Now it's time to run the application.
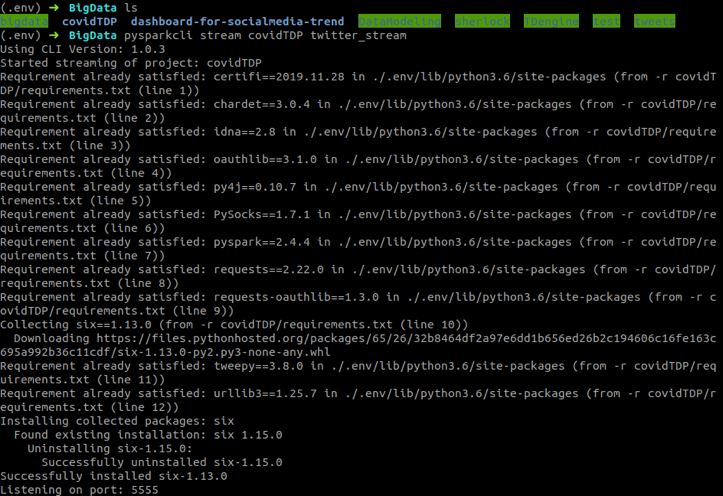
Start the Twitter stream using pysparkcli stream command and then run the PySpark project with pysparkcli run command.
Twitter Stream Initiation
Initiate a stream with the following command:
(.env) ➜ BigData pysparkcli stream covidTDP twitter_stream
Running PySpark Project
It’s time to start running the project.
(.env) ➜ BigData pysparkcli run bigdata
The output is given below.
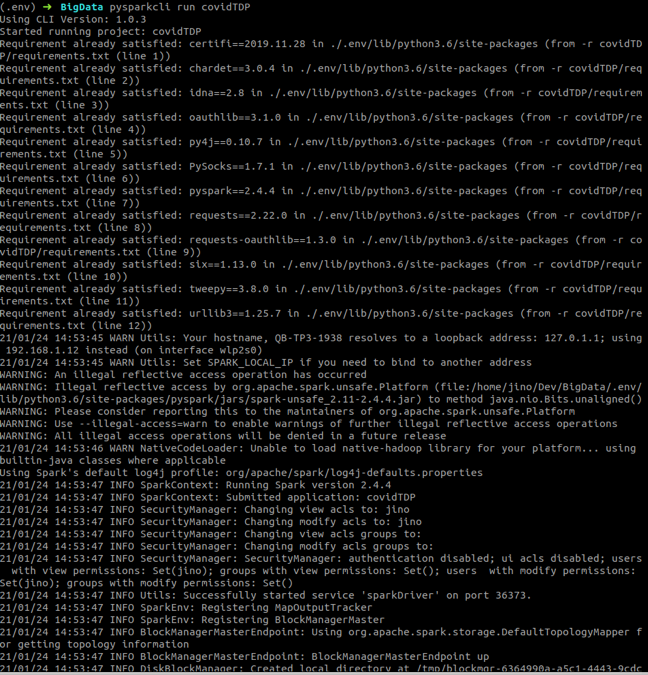
Once the logs start coming in, you can see the raw JSON data that will be consumed by our PySpark streaming application.
Setting Up Django API
The next step is to develop the Django project for building the API for tweets. The code for the Django project is available here.
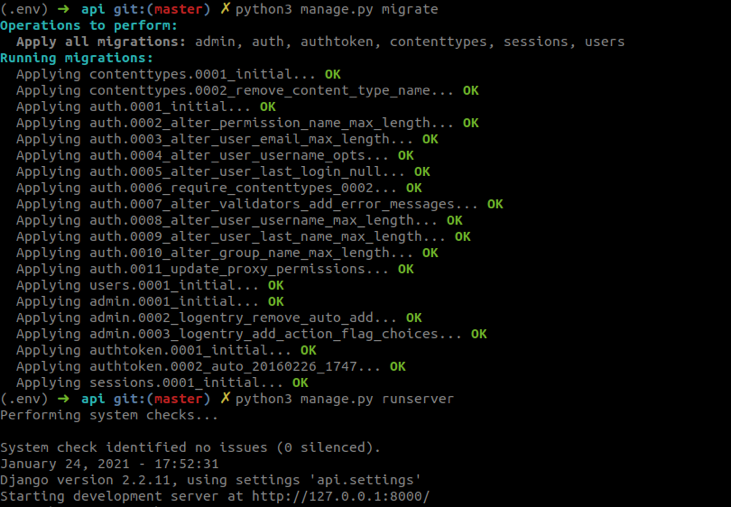
To run the project, use the following commands:
git clone git@github.com:qburst/dashboard-for-socialmedia-trend.gitcd dashboard-for-socialmedia-trend/backendcd apipip3 install -r requirements.txtpython manage.py makemigrationspython manage.py migratepython manage.py collectstaticpython manage.py runserver
The output is given below.
Setting Up the UI
Next, is setting up the UI build using React Native. The frontend code is available here.
Change BASE_URL in the path frontend/src/utils/withBase/index.js. This is to connect with the local Django API server.
const BASE_URL = "http://localhost:8000";
Follow these commands to get the UI running in a development environment.
cd dashboard-for-socialmedia-trend/frontendnpm installnpm start
The above commands will result in the following output.

So now we have the entire platform running in the development environment.
Here's the UI we built.
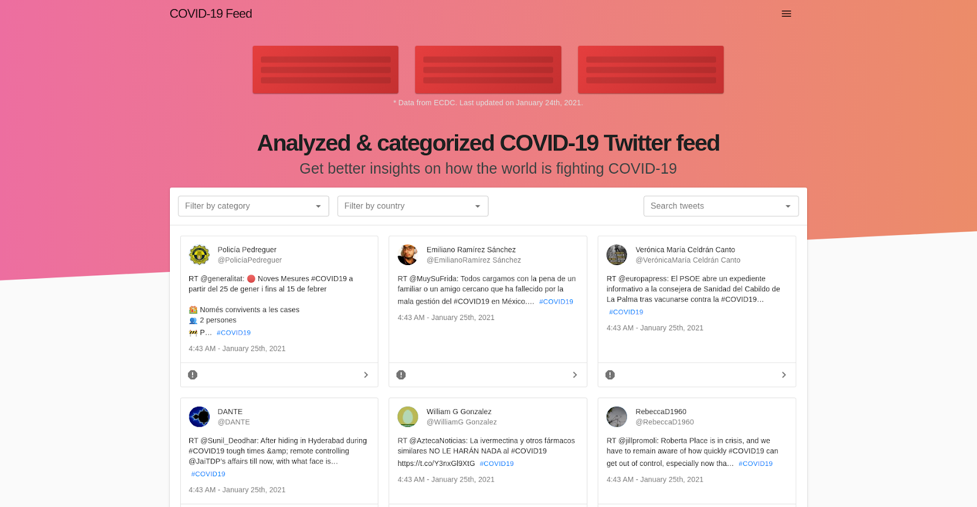
Our platform can now:
- Collect tweets related to Coronavirus and Covid-19.
- Filter these tweets based on categories (New infections/Deaths/Vaccines, etc.).
- Filter these tweets based on country of origin.
- Mark unwanted tweets as spam.
Conclusion
As you have seen, we can create complex streaming projects with ease using PySpark CLI. This entire project is open-sourced and is available on GitHub. If you face any issues while setting up this project in your development environment, you can raise them here.

